Experiments With Salt Melting Ice
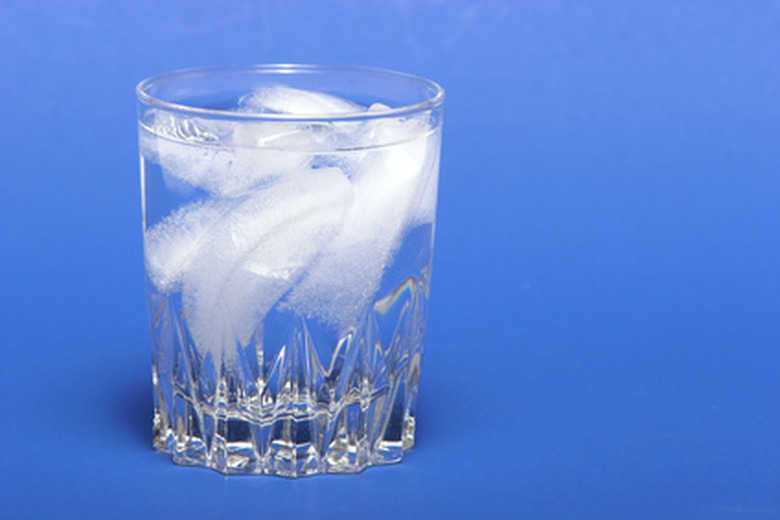
Teachers interested in using salt and ice experiments in the classroom can incorporate a range of theories and methods into lessons. Discuss the properties of salt and its effect on water, the influences on melting ice, or the creation of ice crystals in the winter. Using salt and ice to explore melting points allows students to develop an understanding of substances and their chemical reactions.

How can salt lower the freezing point of water?
This experiment involves students testing the properties and effects of salt on ice and water. Students need 2 cups of water, salt, ice cubes and access to a freezer. First put a tablespoon of salt into one of the cups of water, and place both cups into the freezer. Check each cup every 10 minutes and take a guess as to which cup's water will freeze first. Next, take two ice cubes out of the freezer and put them on a plate. Sprinkle some some salt on one of the ice cubes. Observe and record which ice cube melts the fastest. These two experiments allow students to determine that salt lowers the freezing point of water. Students can infer that salt water can still freeze, but the temperature must be colder than fresh water.
Thread the Ice
Demonstrate the properties of solids and liquids by using an experiment with water and ice. Students need an ice cube, a bowl, some thread and salt. Place the ice cube in the bowl and put the thread across the ice. Sprinkle some salt along the thread and on to the ice cube. Wait for two minutes, and carefully pull the ends of the thread. The thread is now frozen to the ice. The teacher can explain that liquid water has molecules that move around, while the molecules in the solid ice are fixed and do not move. Describe the process of ice melting in terms of the exchange of molecules due to temperature changes. The salt is diluted by the water that has melted off the ice, allowing the ice to capture some of the molecules of water which causes the ice to freeze around the thread.
Salt vs. Sugar: Melting Ice
Compare the effects of salt and sugar on water and ice. Students observe the properties of ice, and that salt speeds up the rate of ice melting compared to sugar or nothing. Students need three zip-lock bags, a teaspoon, ice cubes, salt, sugar and a plastic sheet to cover the work area. First label each zip-lock bag with either control, salt or sugar. Place an ice cube in each of the bags. Measure a teaspoon of salt and place it in the bag labeled salt. Measure a teaspoon of sugar and sprinkle it in the bag labeled sugar. Seal the bags and observe the three ice cubes in the different conditions. Students can infer which ice cube will melt the fastest by watching the transformation of each ice cube.
- CSIRO: Salt vs. Ice
- Project Labs: Ice cubes and salt
Cite This Article
Wehner, Amanda. "Experiments With Salt Melting Ice" sciencing.com , https://www.sciencing.com/experiments-salt-melting-ice-6497888/. 24 April 2017.
Wehner, Amanda. (2017, April 24). Experiments With Salt Melting Ice. sciencing.com . Retrieved from https://www.sciencing.com/experiments-salt-melting-ice-6497888/
Wehner, Amanda. Experiments With Salt Melting Ice last modified March 24, 2022. https://www.sciencing.com/experiments-salt-melting-ice-6497888/
Recommended
Explore the natural world through science and sustainability

How Does Salt Affect Ice? A Simple Science Experiment
Looking for a way to explain to your learners why salt is utilized to combat icy roadways and sidewalks? Check out this simple science experiment to demonstrate how salt affects the freezing point of water and how the over-utilization of salt can be harmful to the environment.
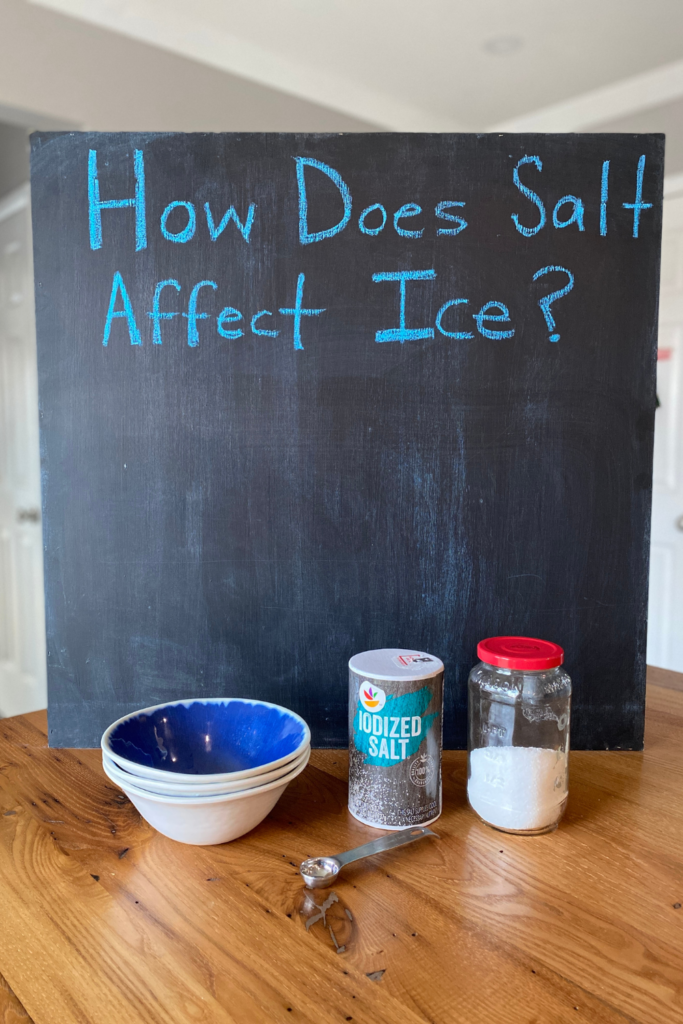
Every winter before a storm, large trucks rumble down the road through my neighborhood, spreading salt crystals over the pavement. My six-year-old was curious about why these trucks appeared before a storm and so I decided to not only tell him but to show him, with a simple science experiment.
The Simple Science of Water and Salt
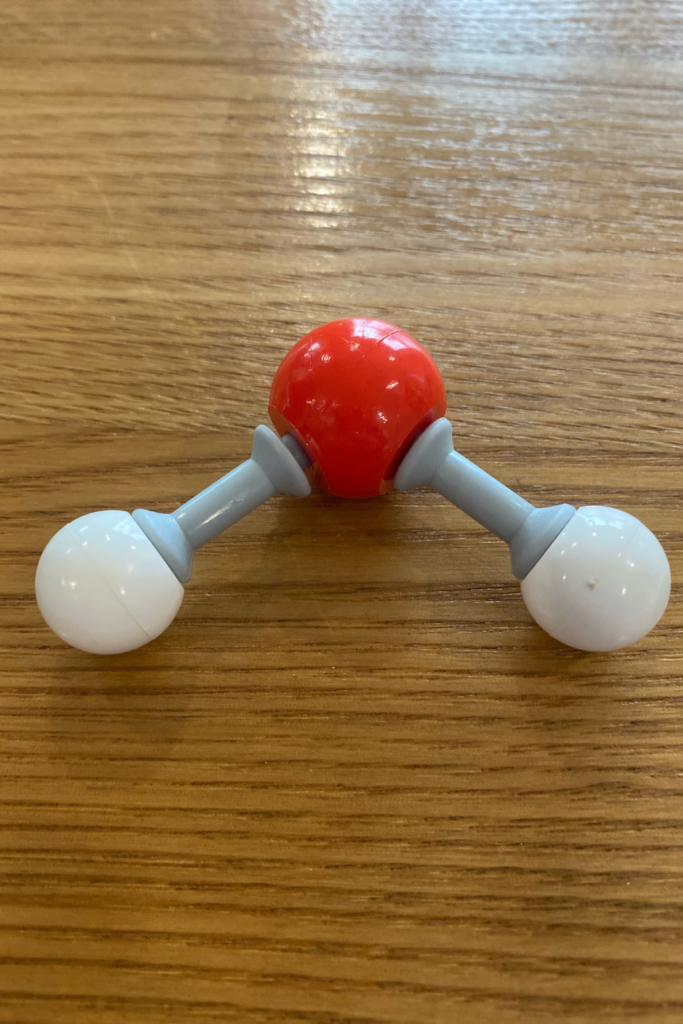
To provide my kids with a bit of background information, I broke out my chemistry modeling set and gave them a brief description of what’s happening at the molecular level.
Water is a molecule that is made up of two elements: hydrogen and oxygen. Water, also written as H 2 O, freezes at 0℃ or 32℉. However, when a compound like sodium chloride, NaCl, what we commonly refer to as salt, is dissolved in water, something interesting happens. The salt compound breaks apart into sodium and chlorine ions and prevents the water molecules from bonding together at their normal freezing point of 0℃ or 32℉. The addition of salt actually lowers the freezing point of water!
When this occurs, we can’t actually see the sodium and chlorine ions at work, as they are way too small for our eyes to observe. What we do notice is that, when salt is applied to ice, the ice begins to melt. This is because the composition of water is no longer plain H 2 O; it now has sodium and chlorine ions floating around in it, causing the freezing point to decrease.
How’s that for some snazzy science?
Making the Science of Salt and Water Visible
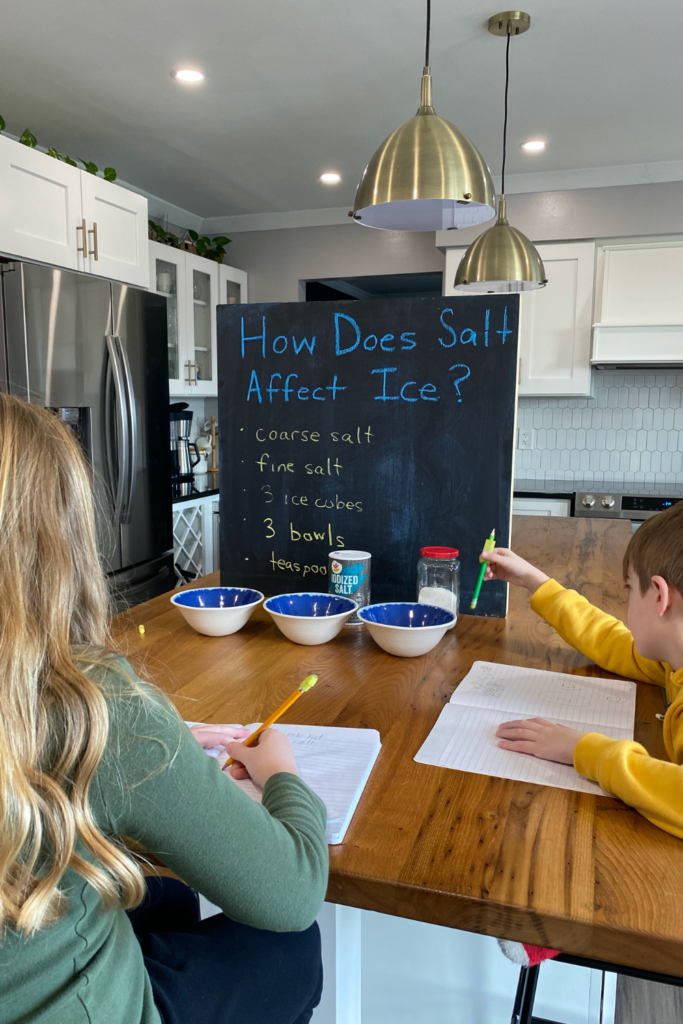
In order to visualize the concept of salt lowering the freezing point of water, I gathered a few simple supplies from my kitchen and got to work. This experiment took approximately 30 minutes for my kids to complete from start to finish, with additional time to discuss the environmental implications of adding salt to icy roadways.
Materials Needed for the Science Experiment
To demonstrate how salt affects the freezing point of water, you’ll need the following materials:
- 2 Ice cubes
- Table salt*
- Timer or Clock
*You can use either fine or coarse table salt for this experiment. I chose to use both to demonstrate the difference in melting time for each option. If you want to test both salt types as well, you will need 3 ice cubes and 3 bowls.
Make Predictions to Practice Critical Thinking Skills
To engage your learners in critical thinking (and to add an extra layer of fun to the science experiment!) have them make the following predictions prior to conducting the experiment:
- Which ice cube will melt the fastest?
- How much time will it take for the plain ice cube to melt?
- How much time will it take for the salty ice cube to melt?
Not only do these questions get students thinking about the experiment, but they also allow them to make mathematical comparisons to the results, engaging the “M” in STEM! Have your learners record their predictions in a table, like the one shown below.
Title: What Effect Does Salt Have on Ice?
I’ll explain more about teaching students how to collect data in an organized manner in the data collection portion of this post.
Most importantly, this is a fun activity to get your kids thinking and making hypotheses. Most children are afraid of being “wrong”; this activity teaches them that being wrong is part of the fun! Taking educated guesses is what drives science forward because when we realize our answer is wrong, we can confidently move forward in the right direction! Try to foster the idea that it’s not the “right” or “wrong” answer that’s important, but rather the learning that happens as a result of the experiment.
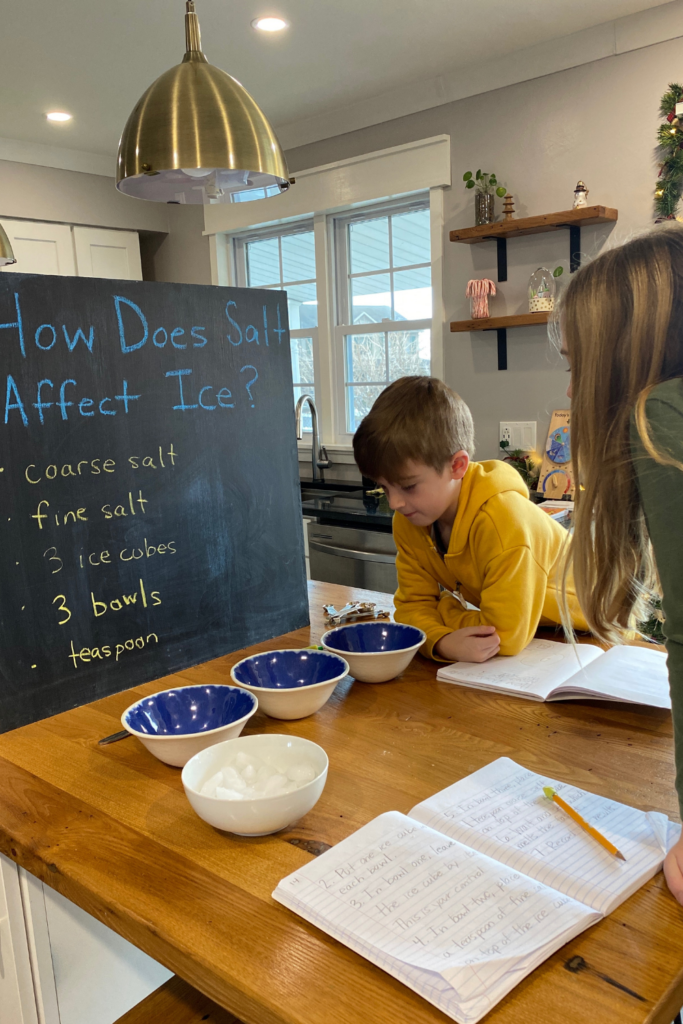
Instructions to Conduct the Salty Ice Experiment
Follow these step-by-step instructions to visualize the effect salt has on the ice.
- Set the bowls on a level surface.
- Place an ice cube in each bowl.
- Label the first bowl as your control. This bowl will only contain an ice cube.
- Label the second bowl as your variable.
- Into the second bowl, pour one teaspoon of table salt on top of the ice cube.
- Record the time or start a stopwatch
- Observe the difference in the time it takes for the two ice cubes to melt.
If you have chosen to test the effect that both fine and coarse table salt have on the ice cubes, add a step to the instructions, applying one teaspoon of the additional salt to a third ice cube.
The temperature of the surrounding air will affect the rate at which both ice cubes melt. You want to specifically focus on the difference in time between the melting rates of the ice cubes.
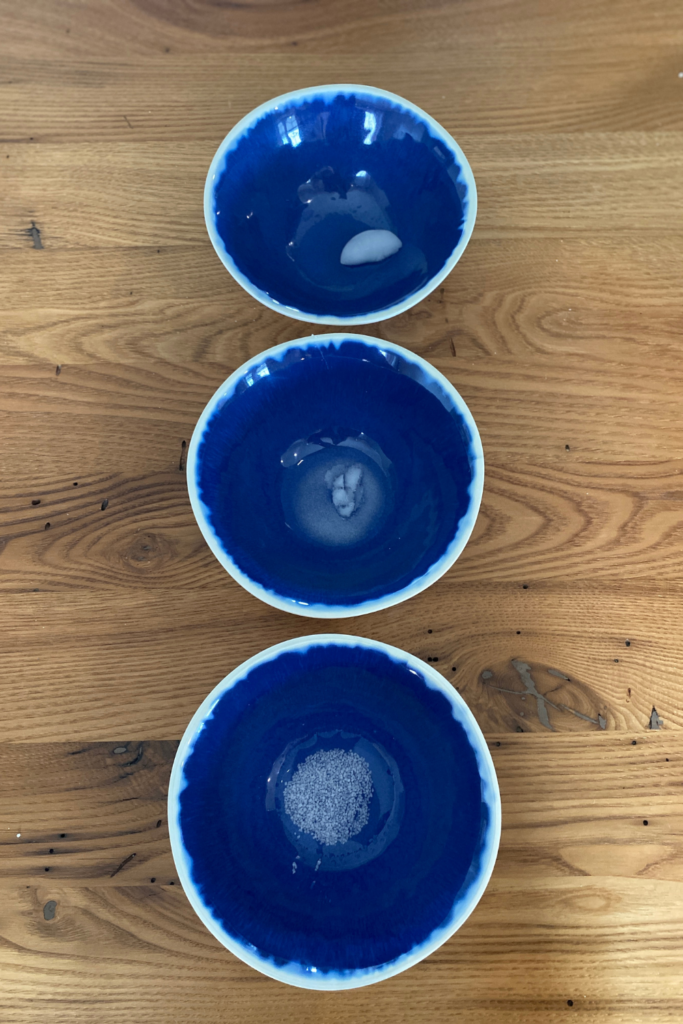
Simple Data Collection for the Science Experiment
This is a great activity to introduce or reinforce the importance of recording data in an organized manner. Create a simple table like the one below for your learners to write down their observations. Point out that a table must have a title, clear labels explaining what each value represents, along with the units of measurement used.
Here is an example of a table to use for the salty ice experiment:
If you have chosen to test an additional type of table salt, be sure to add an extra column to the table.

Discussion Questions for the Salty Ice Experiment
Once your learners have completed the salty ice science experiment, have them revisit their predictions and compare them to the results. Try to avoid statements such as, “Were your predictions right or wrong?” as the aim is not for them to be accurate in their assumptions, but instead to learn how to properly conduct an experiment and analyze results. Here are some prompts you can try to get them thinking:
- Which ice cube changed from solid to liquid first? Why do you think that happened?
- How does the melting time of the plain ice cube compare to your prediction? Did it melt faster or slower than you predicted?
- How does the melting time of the salted ice cube compare to your prediction? Did it melt faster or slower than you predicted?
- How can this knowledge be useful to someone that lives in a climate zone that receives ice and snow in the winter?
Depending on the age and ability level of your learners, have them calculate the numerical difference in predicted versus actual melting times of each ice cube to add an extra mathematical component to this lesson.
Environmental Implications of Using Salt to Decrease Ice Accumulation on Outdoor Surfaces
To apply what they have learned, introduce and discuss the environmental issues that arise when salt is applied in abundance to icy roadways and outdoor surfaces. You can utilize the video lesson I created with Medinah Eatman of Science Teacher Mom to guide this portion of their learning, beginning at the Nature Connection section, found at minute 15 of the virtual lesson. You’ll notice that I reference a printable in the video, which you can access for free here:
Here are the main takeaways from this section of the lesson:
- Excess salt washes into local waterways, causing problems for the plants and animals that reside there.
- Fresh water fish that reside in local waterways have hatchlings that are 30% smaller than average when exposed to higher salinity. Salinity is a value that addresses the amount of salt dissolved in water.
- Increased salinity in freshwater can kill zooplankton and phytoplankton, which are important food resources for fish, clams, snails, and insects.
- Plants can be negatively affected by increased salinity, causing them to have smaller leaves, flowers, and fruit, as well as slower stem growth.
- Large mammals like deer and moose are attracted to the salted roadways, causing in increase in collision rate with these animals during winter months.
The lesson then goes on to discuss the appropriate level of salt to use per area of ice, as well as some salt alternatives currently available to treat icy surface conditions.
Making Science Easily Accessible
Conducting simple scientific experiments like this one allows students to see that science is everywhere and doesn’t require fancy equipment to conduct investigations. Additionally, their confidence in making predictions and interpreting information will grow, strengthening their critical thinking skills.
If you try this salted ice experiment, please let me know by tagging me @thoughtfullysustainable on Instagram or Facebook , or by leaving a comment below! If you have any questions, feel free to email me!

Instructions
1. Set the bowls on a level surface. 2. Place an ice cube in each bowl. 3. Label the first bowl as your control. This bowl will only contain an ice cube. 4. Label the second bowl as your variable. 5. Into the second bowl, pour one teaspoon of table salt on top of the ice cube. 6. Record the time or start a stopwatch 7. Observe the difference in the time it takes for the two ice cubes to melt.
You can use either fine or coarse table salt for this experiment. I chose to use both to demonstrate the difference in melting time for each option. If you want to test both salt types as well, you will need 3 ice cubes and 3 bowls.
Similar Posts
How to Recycle Undamaged Solar Eclipse Glasses in the U.S.
5 Ways to Reuse Plastic Bottles for Science Activities
How to Make a Cartesian Diver Science Project for Kids
How to Explore Sustainability Science Concepts with Kids
Energy Efficiency Experiment for Kids | How Do Window Coverings Affect Room Temperature?
How to Grow Your Own Popcorn
- Pingback: How to Make Ice Cream in a Bag Using Science – Thoughtfully Sustainable
- Pingback: 5 Simple Winter Science Activities and Experiments for Kids – Raising Global Kidizens
Comments are closed.

Ice and Salt Science Experiment
Posted on Published: March 21, 2019
This STEAM activity is perfect for any time of the year! Kids will learn how salt can melt ice with this fun science experiment.
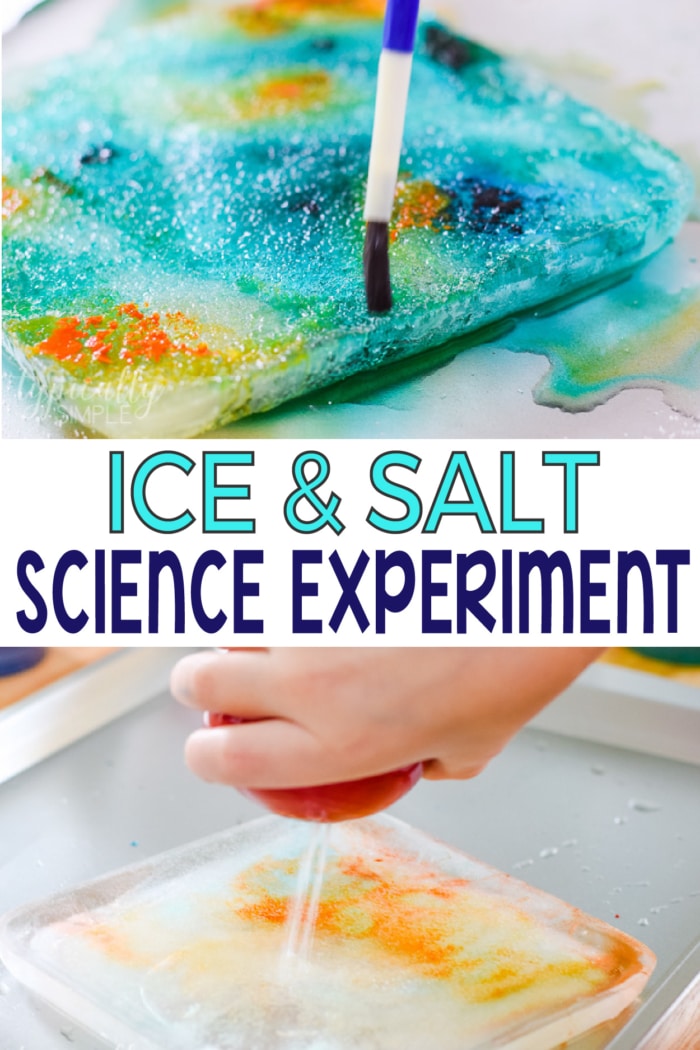
Any activity that combines art and science is a win-win in our house. And for some reason, ones that include melting ice is extra fun! So we decided to turn all of our favorite things into a science experiment.
The first time we did this activity, it was pretty much a free for all with the salt, water, and food coloring. However, it did give us lots of talking points about why the ice melts faster with salt. The salt lowers the freezing point of water, which brought up a whole slew of other questions from my little scientist…thank goodness for Google!
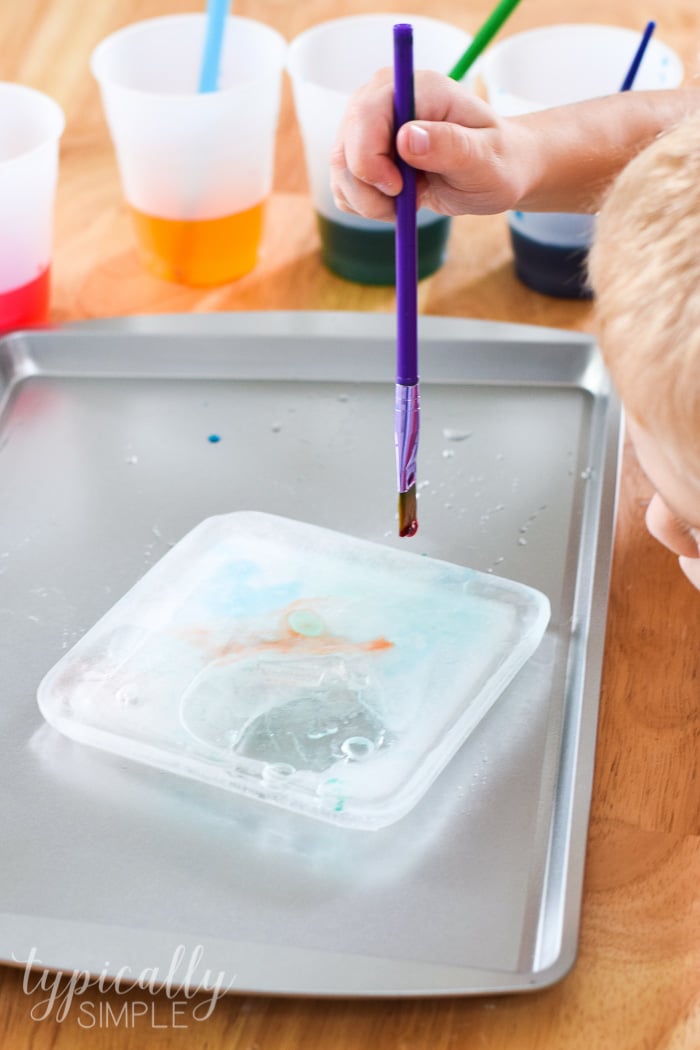
The sections of ice that had lots of salt on it formed little craters that we were able to see right away. And with the help of colorful warm water, we created even bigger craters in the ice.
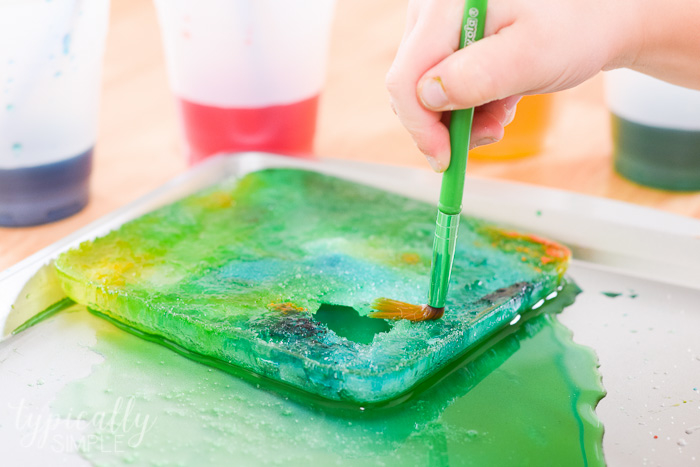
The actual experiment part came into play when we sprinkled salt on one half of the ice block and not the other. We made some predictions then observed what was happening.
Depending on the age of the kiddos, there are so many ways to extend this activity. You could have two different ice blocks, one with salt, one without and then measure how much water has melted off after a certain amount of time. You could try different types of salt or the change the temperature of the water added to the watercolors.
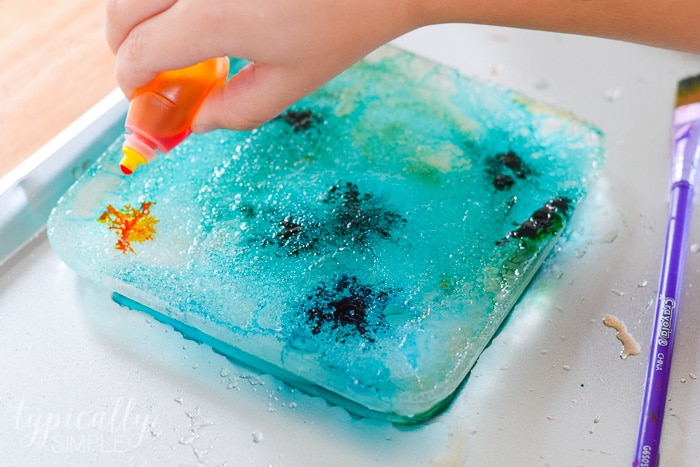
And as with any science experiment, it’s important to talk to your kiddos about safety including how to use the equipment appropriately. They can even use science safety goggles and lab coats during the experiment.

Supplies Needed for Salt & Ice Experiment
- plastic container
- tray or baking sheet
- liquid watercolors or food coloring
- pipettes or paint brushes
- Shop all of my favorite supplies on Amazon to make learning fun!
Set up is fairly easy for this experiment. I filled some plastic containers of different sizes and shapes with water and placed them in the freezer overnight. If you are doing this in the winter and it’s cold enough, you could also freeze them outside…which would make for another great science conversation!
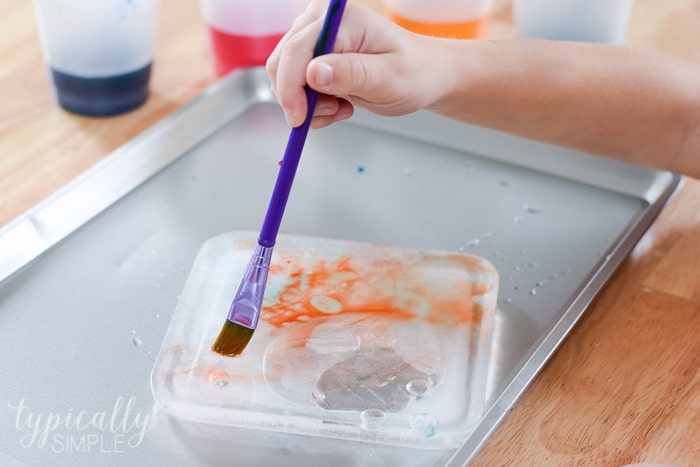
When we were ready for the experiment, I mixed a squirt of liquid watercolor and a little warm water into some cups. Then I placed the ice onto a tray and let the little scientist get to work using salt, paint brushes, and pipettes.
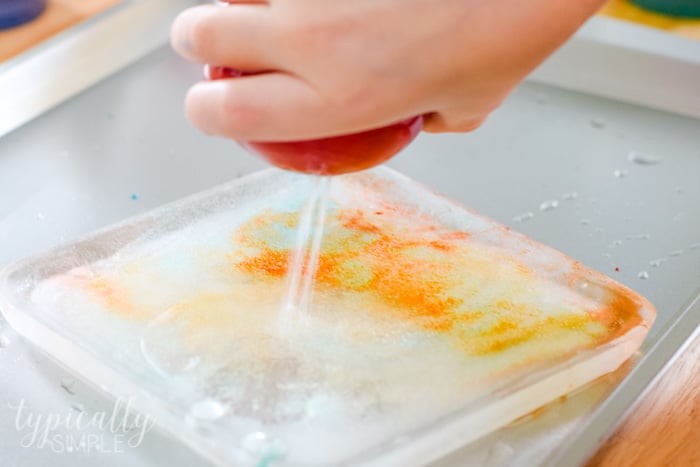
The tray helps keep everything pretty well contained which makes for a quick and easy clean-up. Sometimes I will put everything into a larger plastic container which allows for more open play after doing the guided experiment.
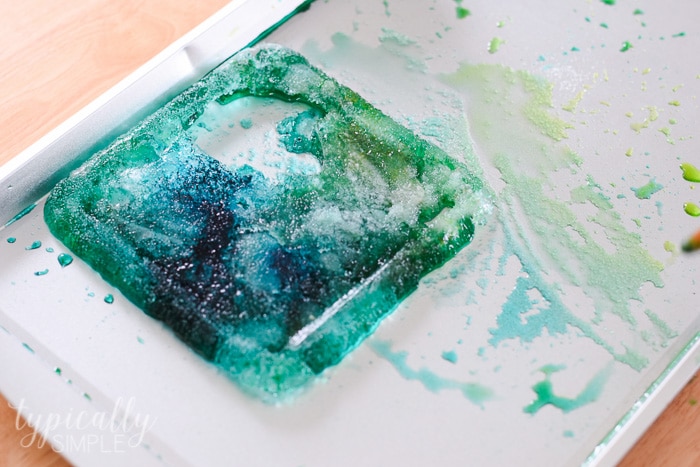
With the colorful art process of painting the ice, mixed with the science experiment of salt melting the ice, this is a fun way to introduce STEAM to your little scientists!
More Colorful Activities
Bubble Painting
How to Dye Pasta Noodles for Crafts
Roll & Cover: Spring Rainbow
Dot Shapes Printables
How to Make Homemade Puffy Paint

Science for Kids: Salt and Ice Experiments
Sharing is caring!
- Facebook 179
- Pinterest 42
Brrr! Winter brings ice and snow and all the fun and not-so-fun activities along with it. As you or your children may end up shoveling a walkway or driving behind a snow plow this winter, everyone might be wondering why we use salt to help melt ice on our walkways and roads. Here is an easy experiment that is relatable to real-world winter conditions. You can test and observe the effects of salt and other household materials on ice. I’ve included the science and real-world applications at the end of this post so you can relate what you discover to the conditions you’ve experienced this winter!
Materials for Salt and Ice Science Experiment
You most likely have everything you need for this experiment right in your kitchen. There is a lot of wiggle room in your experimental design. Have your children help decide what materials you will test on the ice.
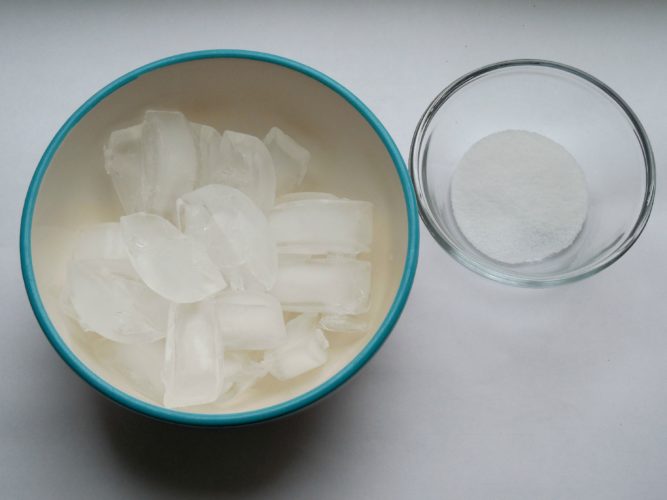
You will need:
- Kitchen scale (these scales are great for tons of different science experiments )
- At least one of the following: sea salt, kosher salt, or other salts from around the globe (try these fun salts for some variety !) sugar, cornstarch, coffee, sand, baking soda, cornmeal, bath salts, etc.
- Several containers or small plates
- Stopwatch or clock
- Measuring spoons
The beauty of this experiment is that you can test just about anything on your ice cube. Just stick to harmless household items. Skip powdered soaps or caustic materials that might be irritating to eyes and skin.
Salt and Ice Experiment
Choose your materials and get started. You’ll need at least 3 different containers. One will hold a plain ice cube as the control in the experiment. Another will hold an ice cube and a pre-determined amount of salt, the third will hold an ice cube and a material for comparison. You can certainly set up more than three if you’d like.
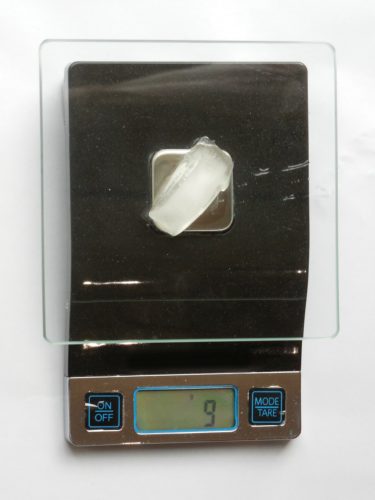
For even more accuracy, you can use the kitchen scale to determine the mass of the ice cubes before you begin. Later on, you can mass them again to get an idea of how much water has melted.
Once you’ve done any sort of weighing or measuring the ice cubes and taken notes, put them in the designated containers. Keep one ice cube bare and cover one with salt. Use the same measurement for all of your materials. For example, if you use 1 teaspoon of salt, use 1 teaspoon of sugar on the next cube. Your ice cubes most likely are not all the same size, but you can control the amount of “melter” you are using. It is always good to teach and remind about precision in an experiment.
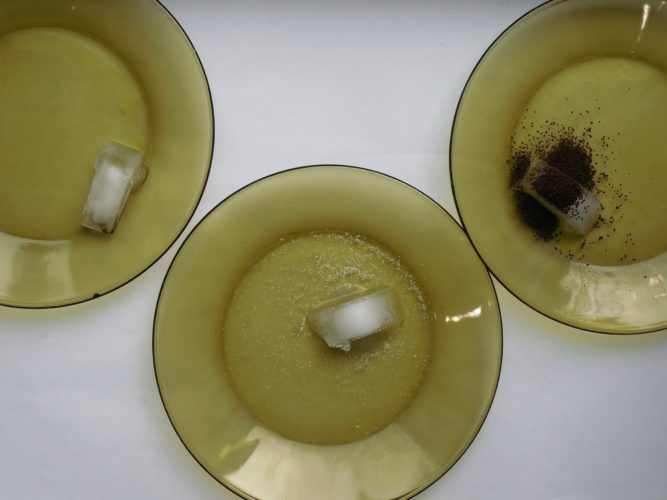
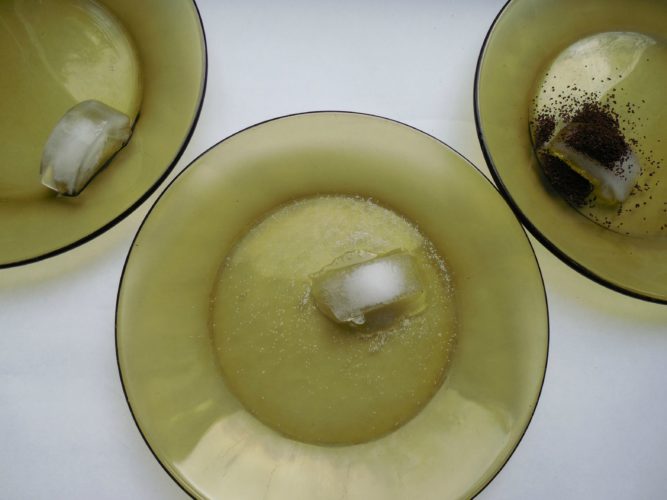
Once the experiment is set up, wait a designated amount of time (5 minutes is a good place to start) to see the effects. Take notes on observable changes. If you got the mass of the ice before the experiment, you can brush off any salt or other melting agent and weigh the cube again. Note that any particle left on the ice cube does add mass, so this measurement helps with accuracy but is not 100% precise.
Keep track of the changes and determine the results of the experiment. If you are working on graphing in math, this is a great opportunity to graph the masses you observed before and after the experiment.
Why Does Salt Melt Ice?
So why do we use salt on our roads and walkways? Why does it seem to melt ice? Salt lowers the freezing point of water. This is called “freezing point depression”, and it means that the water will not freeze until it has reached a lower temperature than the normal freezing temperature of 32 degrees Fahrenheit (0 degrees Celsius). The salt’s structure makes it more difficult for the water molecules to form the rigid formation they need to be in to become ice.
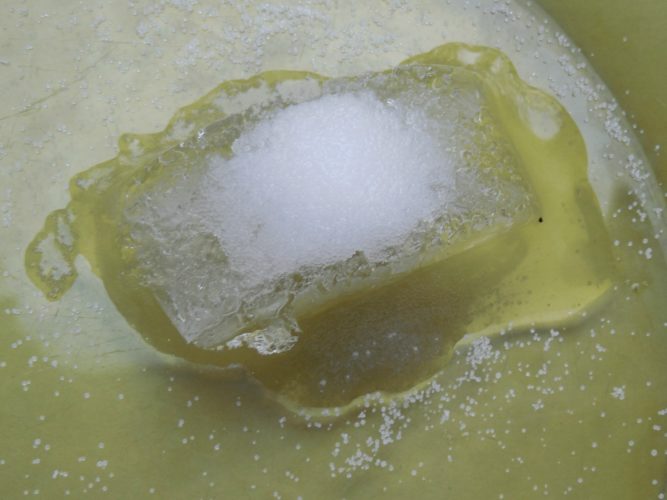
All substances have freezing points–the temperature at which they freeze–and melting points. To further explore melting points, check out science experiment with the pop-up timers used to cook meat .

Follow Share it! Science: Google+ Pinterest Facebook Twitter Bloglovin’ EDwords- BAM! Radio Network Science Seeker- Education Feed

Similar Posts

Roll a Story: Mother Goose!

World Traditions: Befana in Italy

The Thankful Tree
How to Make a Pumpkin Birdfeeder
Programming for Kids: KidCoder Beginning Web Design {Schoolhouse Crew Review}
- Pingback: Salt and Ice Experiments -
Leave a Reply Cancel reply
Your email address will not be published. Required fields are marked *
This site uses Akismet to reduce spam. Learn how your comment data is processed .
Theme Layout
Boxed or wide or framed, theme translation, display featured slider, featured slider styles, display grid slider, grid slider styles, display trending posts, display author bio, display instagram footer, mobile navigation.
- Arts & Crafts
- Places to Visit
All rights reserved Learning and Exploring Through Play 2016

Top Navigation Menu

Ice and Salt Experiment for Preschool

No comments:
Post a comment, follow @learningthroughplay8.

- Privacy Policy
- Science, Tech, Math ›
- Chemistry ›
- Activities for Kids ›
Melting Ice Science Experiment
Jose A. Bernat Bacete / Getty Images
- Activities for Kids
- Chemical Laws
- Periodic Table
- Projects & Experiments
- Scientific Method
- Biochemistry
- Physical Chemistry
- Medical Chemistry
- Chemistry In Everyday Life
- Famous Chemists
- Abbreviations & Acronyms
- Weather & Climate
- Ph.D., Biomedical Sciences, University of Tennessee at Knoxville
- B.A., Physics and Mathematics, Hastings College
This is a fun, non-toxic project for kids of all ages, and the best part is you likely have everything you need at home. All you need is ice, salt, and food coloring.
You can use any type of salt for this project. Coarse salt, such as rock salt or sea salt , works great. Table salt is fine. Also, you could use other types of salt besides sodium chloride (NaCl). For example, Epsom salts are a good choice.
You don't have to color the project, but it's a lot of fun to use food coloring, watercolors, or any water-based paint. You can use liquids or powders, whichever you have handy.
- Food coloring (or watercolors or tempera paints)
Experiment Instructions
- Make ice. You can use ice cubes for this project, but it's nice to have larger pieces of ice for your experiment. Freeze water in shallow plastic containers such as disposable storage containers for sandwiches or leftovers. Only fill the containers part way to make relatively thin pieces of ice. The salt can melt holes all the way through thin pieces, making interesting ice tunnels.
- Keep the ice in the freezer until you are ready to experiment, then remove the blocks of ice and place them on a cookie sheet or in a shallow pan. If the ice doesn't want to come out, it's easy to remove ice from containers by running warm water around the bottom of the dish. Place the pieces of ice in a large pan or a cookie sheet. The ice will melt, so this keeps the project contained.
- Sprinkle salt onto the ice or make little salt piles on top of the pieces. Experiment.
- Dot the surface with coloring. The coloring doesn't color the frozen ice, but it follows the melting pattern . You'll be able to see channels, holes, and tunnels in the ice, plus it looks pretty.
- You can add more salt and coloring, or not. Explore however you like.
Clean Up Tips
This is a messy project. You can perform it outdoors or in a kitchen or bathroom. The coloring will stain hands, clothes, and surfaces. You can remove coloring from counters using a cleaner with bleach.
How It Works
Very young kids will like to explore and may not care too much about the science, but you can discuss erosion and the shapes formed by running water. The salt lowers the freezing point of water through a process called freezing point depression . The ice starts to melt, making liquid water. Salt dissolves in the water, adding ions that increase the temperature at which the water could re-freeze. As the ice melts, energy is drawn from the water, making it colder. Salt is used in ice cream makers for this reason. It makes the ice cream cold enough to freeze. Did you notice how the water feels colder than the ice cube? The ice exposed to the salty water melts faster than other ice, so holes and channels form.
- Kitchen Science Experiments for Kids
- Safe Science Experiments
- Science Projects Photo Gallery
- Easy Chemistry Experiments to Do at Home
- Mad Scientist Party Theme
- Homemade Iceberg Experiment
- Grade School Science Fair Project Ideas
- Middle School Science Experiments
- Easy Science Projects
- Mentos and Soda Project
- Bottle Balloon Blow-Up Experiment
- Top Chemistry Projects for Bored Kids
- Fried Green Egg Food Science Project
- Science Experiments and Activities for Preschoolers
- Fluorescent Light Science Experiment
- Simple Water Science Magic Tricks

IMAGES
COMMENTS
Teachers interested in using salt and ice experiments in the classroom can incorporate a range of theories and methods into lessons. Discuss the properties of salt and its effect on water, the influences on melting ice, or the creation of ice crystals in the winter. Using salt and ice to explore melting points allows students to develop an understanding of substances and their chemical reactions.
What we do notice is that, when salt is applied to ice, the ice begins to melt. This is because the composition of water is no longer plain H 2 O; it now has sodium and chlorine ions floating around in it, ... Here is an example of a table to use for the salty ice experiment: Title: What Effect Does Salt Have on Ice? Ice Cube: Ice Cube + Salt:
Kids will learn how salt can melt ice with this fun science experiment. This STEAM activity is perfect for any time of the year! ... With the colorful art process of painting the ice, mixed with the science experiment of salt melting the ice, this is a fun way to introduce STEAM to your little scientists! More Colorful Activities. Bubble Painting
Salt and Ice Experiment. Choose your materials and get started. You'll need at least 3 different containers. One will hold a plain ice cube as the control in the experiment. Another will hold an ice cube and a pre-determined amount of salt, the third will hold an ice cube and a material for comparison.
Investigate the effect of temperature on how colligative properties melt the ice cubes. To do this, try your experiment at different temperatures, such as room temperature or outside on a hot day. Be sure to monitor the temperature regularly throughout your experiment. Do other substances help melt the ice cubes more quickly or slowly?
Fun, easy, and quick kitchen science experiment for kids of all ages. Perfect for winter science experiments and lessons Learn how salt melts ice, go fishing, and "catch" some for yourself! Awesome STEM activity that is simple enough for preschool, yet entertaining enough for older kids and science fair projects, too.
A fun, ice and salt experiment that is perfect for Preschool children!--> Theme Layout. Boxed or Wide or Framed. Theme Translation. ... Before letting your children play with ice, always swill the ice with warm water. This starts the melting process and will prevent fingers from sticking to the ice. I would advise full adult supervision ...
Why does salt make ice melt faster? Salt lowers the freezing point of water. The freezing point of pure water is 32 degrees Fahrenheit/ 0 degrees Celsius. The freezing point of salt water is different depending on the amount of salt in the water, but for reference, the freezing point of ocean water is about 28.4 degrees.
Place the pieces of ice in a large pan or a cookie sheet. The ice will melt, so this keeps the project contained. Sprinkle salt onto the ice or make little salt piles on top of the pieces. Experiment. Dot the surface with coloring. The coloring doesn't color the frozen ice, but it follows the melting pattern. You'll be able to see channels ...
To do the ice melting experiment, you sprinkle salt over the ice blocks. The salt melts the ice faster than the ambient temperature, melting tunnels and crevasses into the ice. Add color! Once you have some crevasses in your ice, use a dropper to add color (liquid watercolors or watered-down food coloring). The liquid color highlights the ...