

Oil and Water Experiment: Simple Science for Kids
A fun and simple science experiment for kids using just 3 common household items.
Experimenting with oil,water and dishwashing detergent is a fun way to explore basic chemistry with kids.
This science experiment is suitable for kids over 4 years of age.
There is no need any special equipment… in fact I am sure you already have everything you need in your kitchen cupboards. It can be a little messy so I suggest attempting the experiment outside or somewhere that is easy to clean.
When my kids and I are playing with science I like to ask them lots of questions and listen to their answers – they come up with some very imaginative responses. But if you are interested in the facts, I have included an explanation for what is happening at the end of the post.
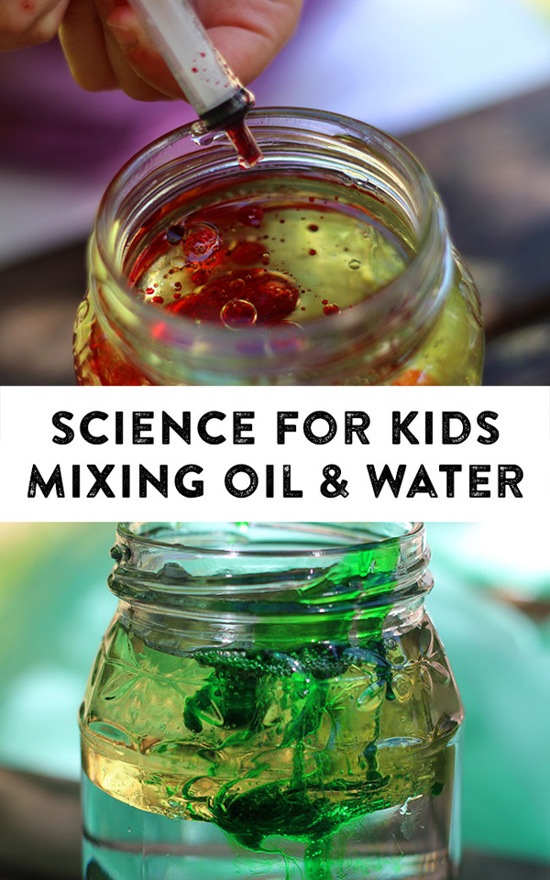
Oil, Water & Detergent Experiment
You will need:
- Glass jam jars (with secure lids if you want to shake them)
- Jug of water
- Vegetable oil
- Dishwashing detergent
- Food colouring
- Small container
- Syringes or pipettes
- A cloth for accidental spills
- Optional: Table salt
Experiment Directions: 1. Pour one cup of water into your glass jam jar.
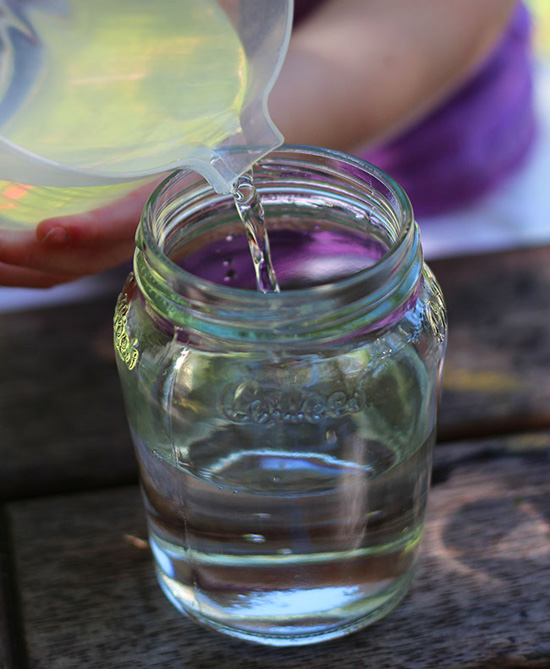
2. Pour half a cup of vegetable oil on top of the water in the jar.
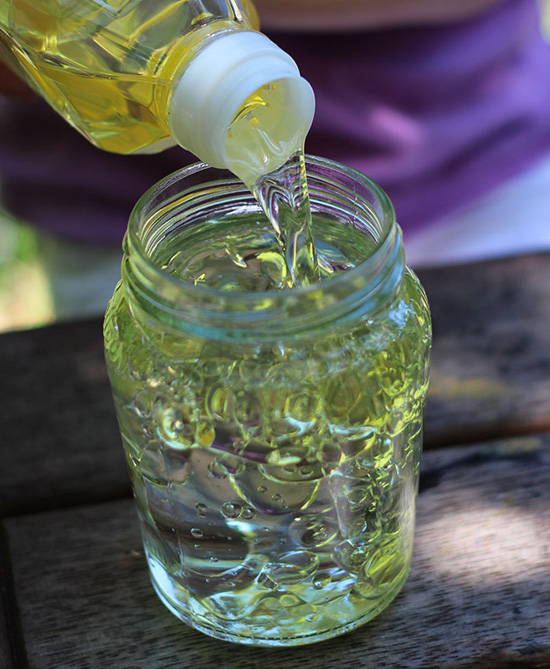
3. Stop and observe. Does the oil mix with the water? Screw the lid onto the jar and shake it…. can you make the oil and water mix?
For children learning about density this is a great time to ask, “Is the vegetable oil more or less dense than the water?”
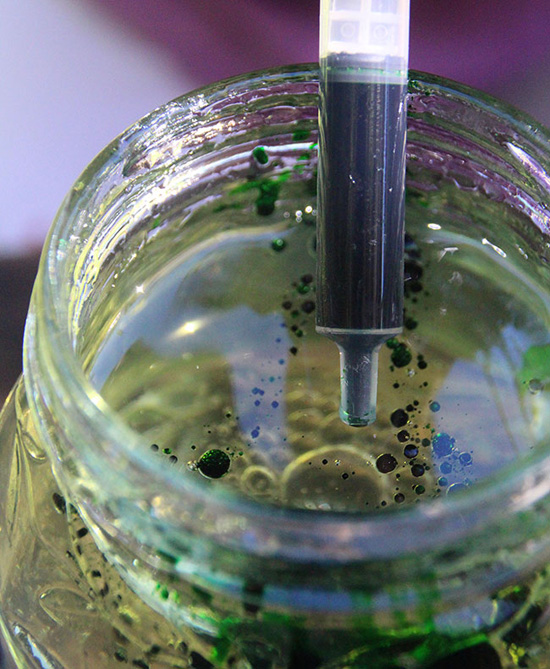
4. Mix a generous squirt of dishwashing detergent with some food colouring in the separate small container.
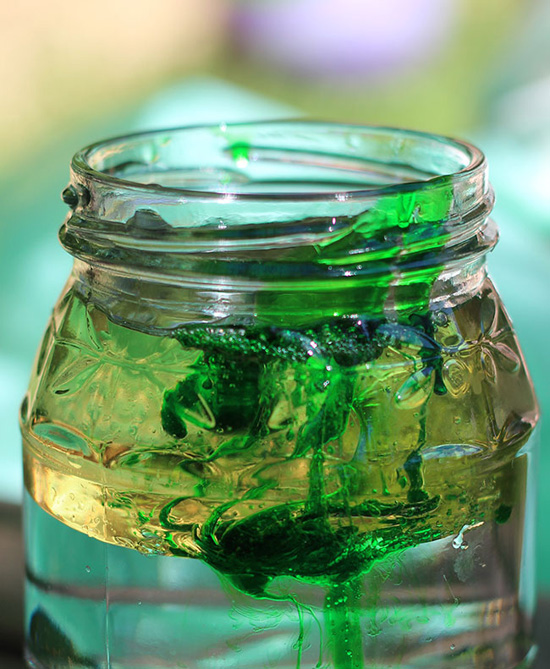
5. Using a dropper or a syringe squirt some coloured detergent into your oil and water filled jar.
7. If you would like to see a different reaction try pouring a teaspoon of salt into the mixture and watch what happens.
Oil and water experiment explanation: What is happening?
There are a lot of interesting things to note during this experiment.
Firstly oil and water do not mix. Even if you shake the jar the oil will immediately separate from the water as soon as it settles. Oil molecules are attracted to other oil molecules so they stick together. The same goes for water molecules….. so they just don’t mix – they are immiscible .
Secondly, the oil always floats on top of the water because the oil has a lower density than water. You can find out why liquids layer by density in our Density Experiment .
Detergent is different again. It is attracted to both water and oil molecules. Detergent grabs onto both types of molecules causing oil droplets to be suspended in the water. When you shake the jar the detergent molecules adhere the water and oil together forming an emulsion. An emulsion is the combination of molecules that are not normally attracted to each other, that don’t usually mix. That is why detergent is so useful for cleaning greasy dishes!
You might also like…
Ali Wright is mum to two young mini makers – their favourite place to be is around the craft table with glitter in their hair. Ali's focus is on process oriented art as she loves watching her kids experiment with creative materials. When not busy with art and craft, you'll likely find them at work and play in their small city garden. As the mini makers love a good mess, their days include lots of water and messy play!
i just have a simple question. Do you have to use a glass jar? Can it be plastic?
Hi Cheryl, plastic will work too 🙂 Cheers Ali
hello, is there any safety risks involved or no ?
- Pingback: 100 TV Free Activities - Fullact Trending Stories With The Laugh Mixture
Hi! What type of Chemical Reaction is this? Your answer is very much appreciated.
can you use dishwashing liquid instead of detergant?
So, why does detergent separate water and oil?
Comments are closed.
Cool Science Experiments Headquarters
Making Science Fun, Easy to Teach and Exciting to Learn!
Science Experiments
Mixing Oil & Water Science Experiment
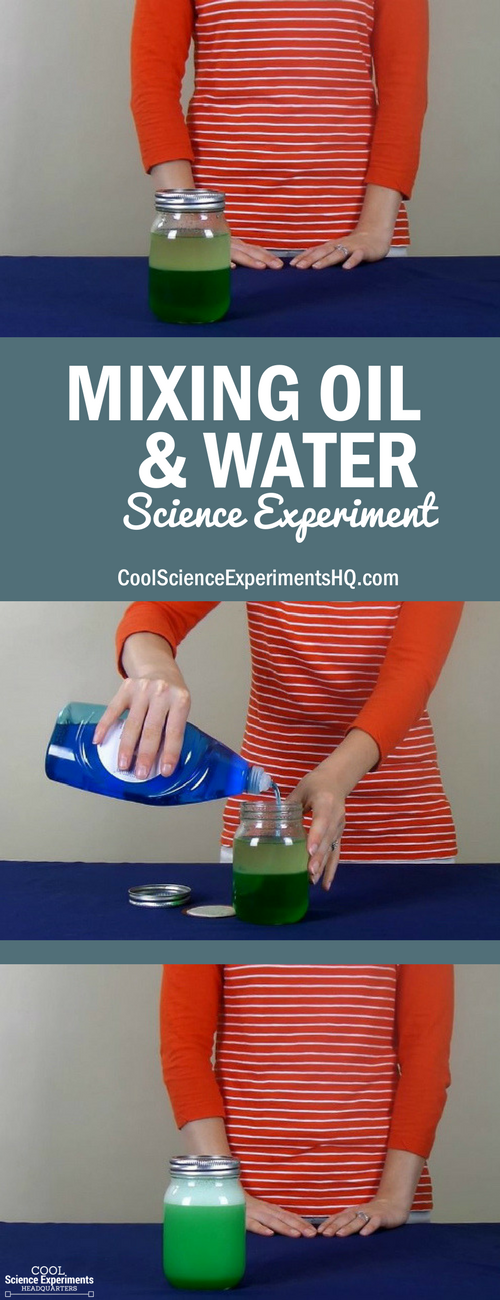
Have you ever heard the saying, “Oil and water don’t mix”? For this easy science experiment, we observe exactly what does happens when we mix oil and water, then we’ll add another item to the mix to see how it changes!
With only a few common kitchen items, kids can explore density and the reaction of adding an emulsifier (dish soap) to the experiment. A printable instruction sheet with a materials list, demonstration video, and a simple scientific explanation are included.
JUMP TO SECTION: Instructions | Video Tutorial | How it Works
Supplies Needed
- Glass Jar with a lid (a pint canning jar works great)
- 1 cup Water
- Food Coloring
- 1 cup Oil (we used vegetable oil)
- 2 teaspoons Dish Soap
Mixing Oil & Water Science Lab Kit – Only $5
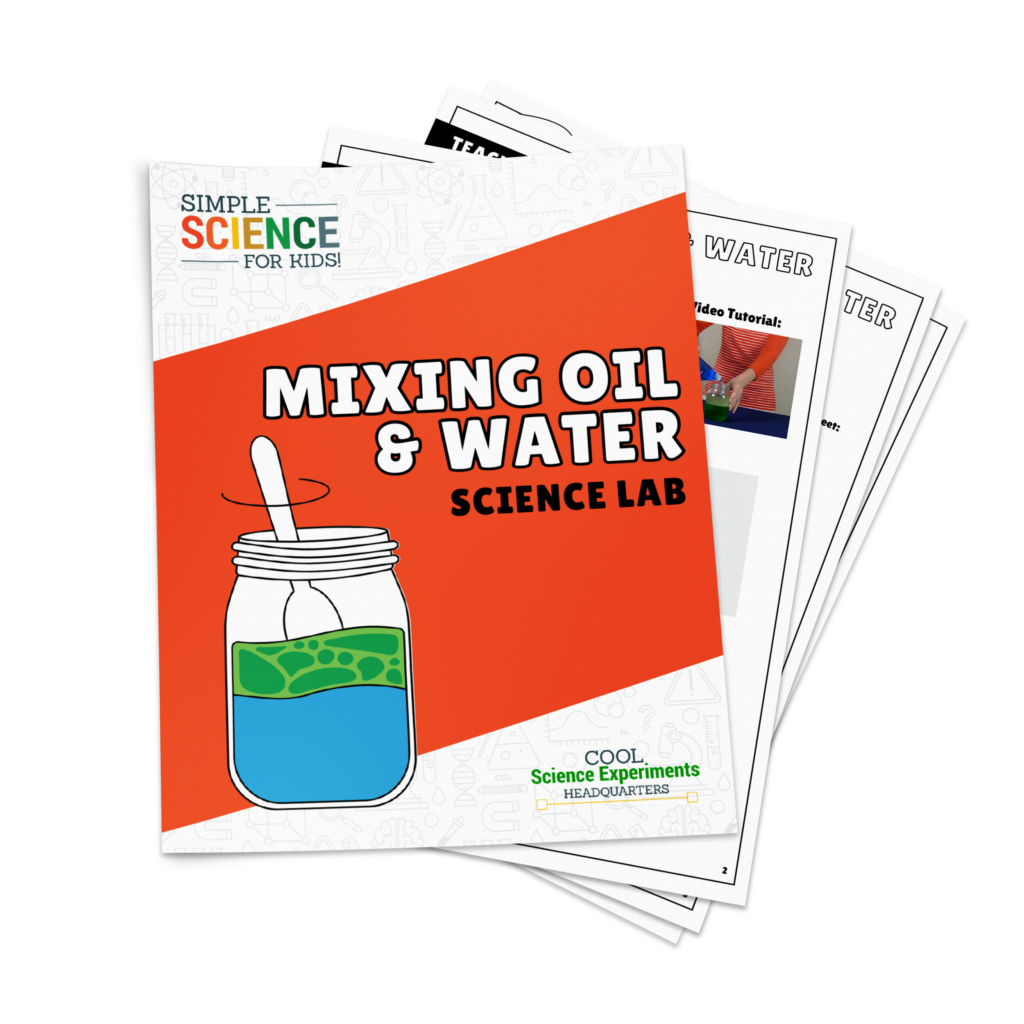
Use our easy Mixing Oil & Water Science Lab Kit to grab your students’ attention without the stress of planning!
It’s everything you need to make science easy for teachers and fun for students — using inexpensive materials you probably already have in your storage closet!
Mixing Oil & Water Science Experiment Instructions
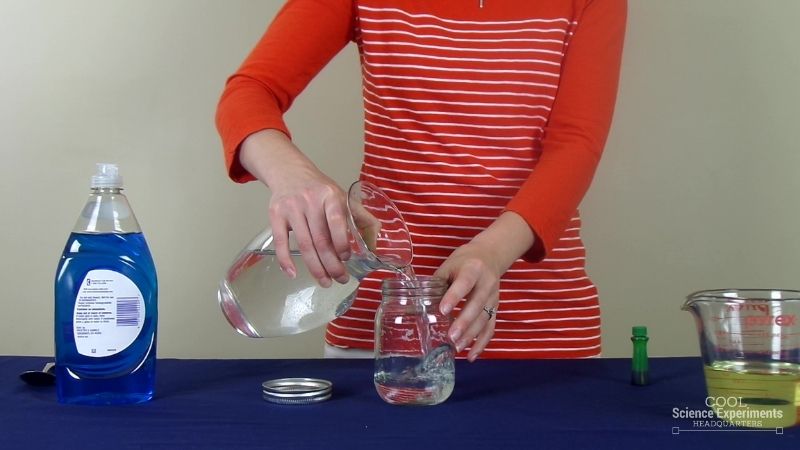
Step 1 – Start by filling the jar with 1 cup of water.
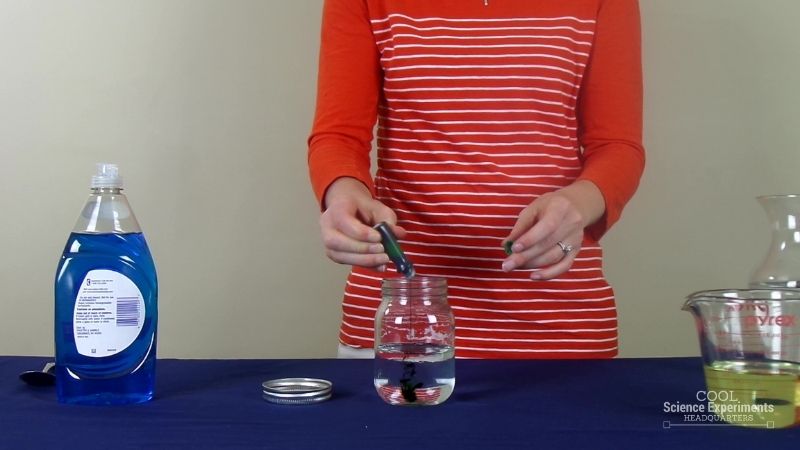
Step 2 – Add a few drops of food coloring to the water and stir until combined. Make some observations about the water. What happened when the food coloring was added? Was it easy to mix the food coloring into the water? Does the food coloring stay mixed with the water? What do you think will happen when we pour the oil into the jar? Write down your hypothesis (prediction) and then follow the steps below.
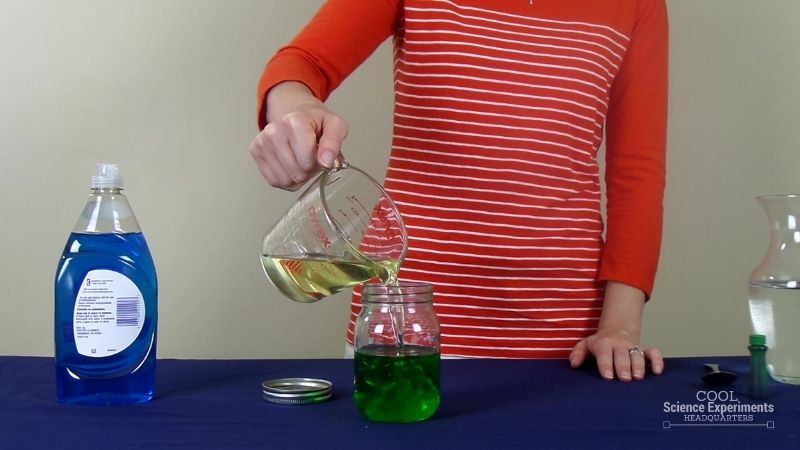
Step 3 – Next pour 1 cup of oil into the jar. Make a few observations. Does the oil behave the same was as the food coloring did when you added it to the water?
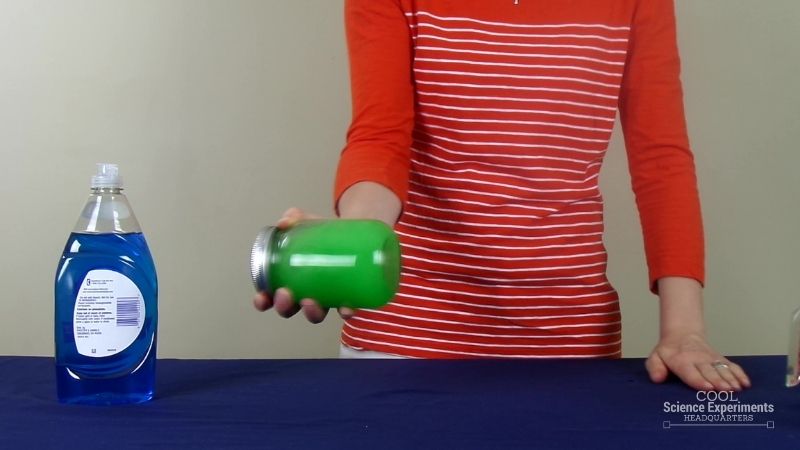
Step 4 – Securely tighten the lid on the jar and shake it for 15-20 seconds.
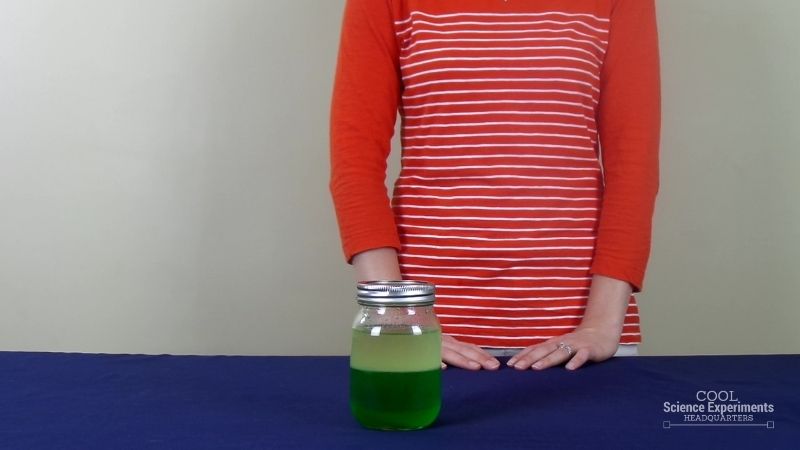
Step 5 – Set the jar down and watch the jar for a couple of minutes. Observe what happens to the oil and the water and write down your findings. Did the oil and water stay mixed together? Was your hypothesis correct? Do you think there is anything else that can be added to the jar to prevent the oil and water from separating?
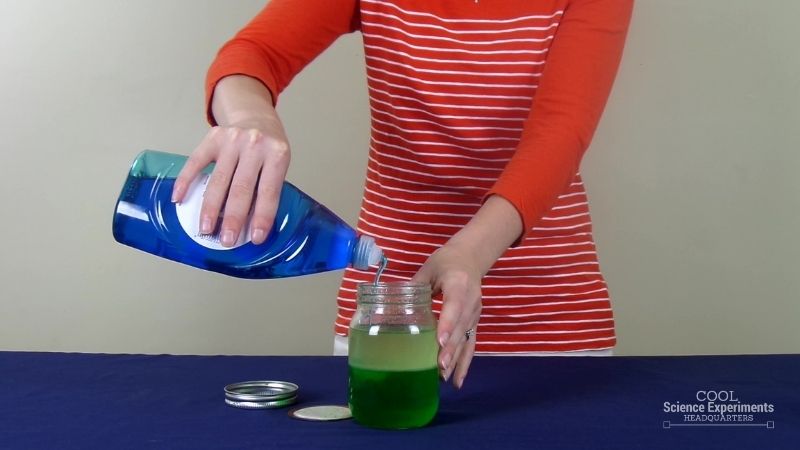
Step 6 – Next, take the lid off the jar and squirt in 1-2 teaspoons of dish soap.
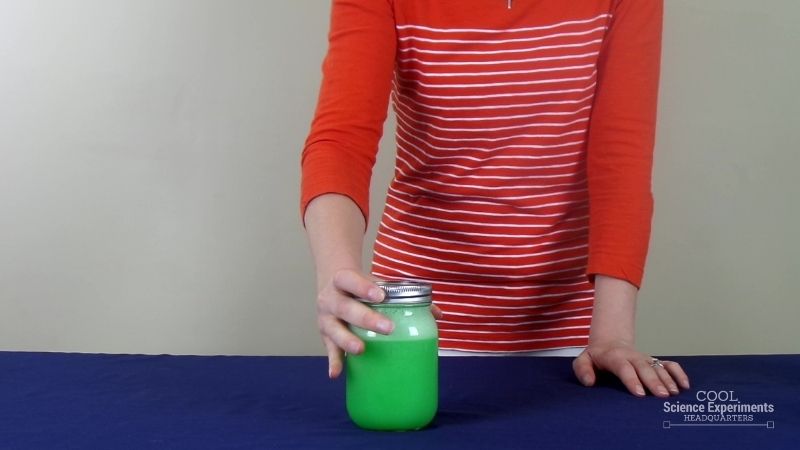
Step 7 – Tighten the lid back on the jar and shake again for another 15-20 seconds.
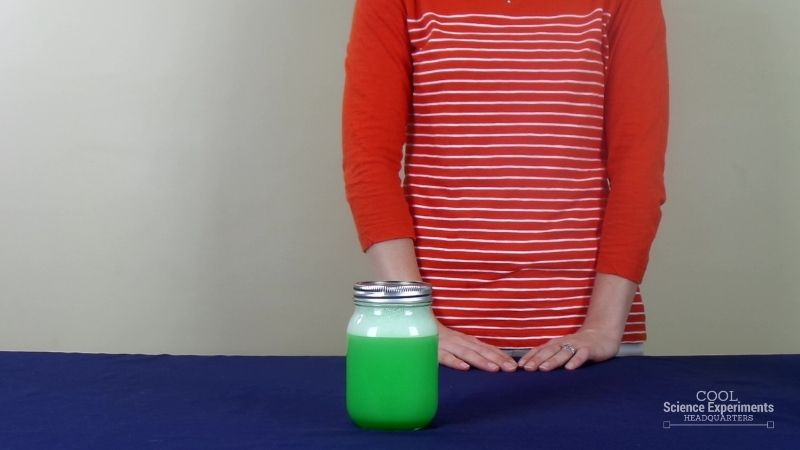
Step 8 – Set the jar down and watch the liquid for a minute or two. Observe what happens to the oil and the water now that the dish soap has been added to the mix. Write down your findings. Did the oil and water stay mixed together this time? Do you know why adding the dish soap preventing the oil and water from separating? Find out the answer in the how does this experiment work section below.
Video Tutorial
How Does the Science Experiment Work
The first thing you will observe is that oil and water will not stay mixed together, no matter how hard you shake the jar. Instead, the oil slowly rises to the top of the water. This is because of the density of the two liquids. Density is a measure of the mass per unit volume of a substance. Water has a density of 1 g/mL (g/cm3). Objects will float in water if their density is less than 1 g/mL. Objects will sink in water if their density is greater than 1 g/mL. The oil is LESS dense than the water. This is because the molecules of oil are larger than the molecules of water, so oil particles take up more space per unit area. As a result, the oil will rise to the top of the water.
The second thing you will observe is that adding dish soap to the mixture changed the results of the experiment. When oil, water and dish soap are mixed together, the oil and water don’t separate like they did when they were the only two items in the jar. This is because of the chemistry of the oil, water and soap molecules.
Oil (and other fats) are made of nonpolar molecules, meaning they cannot dissolve in water. Water is made of polar molecules that can dissolve other polar molecules. Soap is made of molecules that have a hydrophilic (“water-loving”) end and a hydrophobic (“water-fearing”) end. Without soap, water and oil cannot interact because they are unlike molecules. When you add soap to the mixture, the hydrophobic end of the soap molecule breaks up the nonpolar oil molecules, and the hydrophilic end of the soap molecule links up with the polar water molecules. Now that the soap is connecting the fat and water, the non-polar fat molecules can be carried by the polar water molecules. Now the oil and water can be mixed together and stay mixed together!
I hope you enjoyed the experiment. Here are some printable instructions:
Mixing Oil & Water Science Experiment
- Glass Jar with a lid (a pint canning jar works great)
Instructions
- Start by filling the jar with 1 cup of water.
- Add a few drops of food coloring to the water and stir until combined.
- Pour 1 cup of Oil into the jar.
- Securely tighten the lid on the jar and shake it for 15-20 seconds.
- Set the jar down and watch the liquid for a minute or two. Observe what happens to the Oil and the Water.
- Next, take the lid off the jar and squirt in 1-2 teaspoons of dish soap.
- Tighten the lid back on the jar and shake again for another 15-20 seconds.
- Set the jar down and watch the liquid for a minute or two. Observe what happens to the Oil and the Water now that the dish soap has been added to the mix.
Reader Interactions
October 4, 2017 at 11:43 am
Super ….. !
October 6, 2017 at 12:12 pm
Hi ! This gives us really good experiment
November 6, 2017 at 3:40 pm
This was the best science fair project ever
November 14, 2017 at 5:10 pm
December 10, 2017 at 10:38 am
This experiment is fun
Leave a Reply Cancel reply
Your email address will not be published. Required fields are marked *
Save my name, email, and website in this browser for the next time I comment.

- Privacy Policy
- Disclosure Policy
Copyright © 2024 · Cool Science Experiments HQ
Science Fun

Do Oil And Water Mix Density Science Experiment
In this fun and easy density science experiment for kids, we’re going to see if oil and water mix.
- Empty plastic bottle
- Food coloring
- Cooking oil
- Dish washing liquid
Instructions:
- Add ½ cup of water to the empty plastic bottle.
- Add a drop or two of food coloring to the water.
- Add ½ cup of cooking oil to the plastic bottle.
- Screw the lid onto the bottle and shake vigorously.
- Set the bottle down and observe what happens.
EXPLORE AWESOME SCIENCE EXPERIMENT VIDEOS!
How it Works:
This is a great activity to observe density in action. As the bottle sits undisturbed after shaking, density will quickly take over and the oil will make its way past the more dense water toward the top of the bottle.
Make This A Science Project:
Try different types of oil. Try adding salt to the experiment. Try warm water. Try adding a drop of dish soap.
EXPLORE TONS OF FUN AND EASY SCIENCE EXPERIMENTS!
SUBSCRIBE AND NEVER MISS A NEW SCIENCE FUN VIDEO!
previous experiment
Next experiment.
Laughing Kids Learn
Where learning is made fun
Mixing oil and water science experiment
July 13, 2020 by Kate 2 Comments
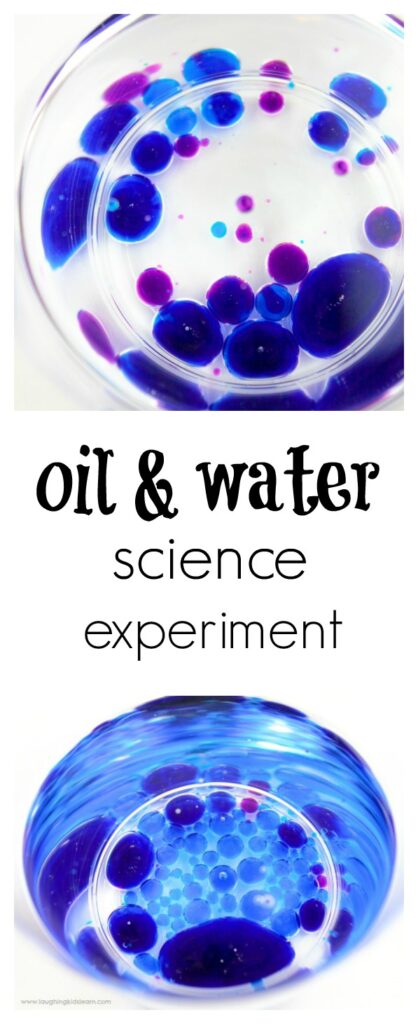
Science always sparks great interest and questions from children when involved in experiments. Encourage your child to learn about density of liquids by having prepared this mixing oil and water science experiment . It’s great fun and you can prepare it with only a few simple ingredients.
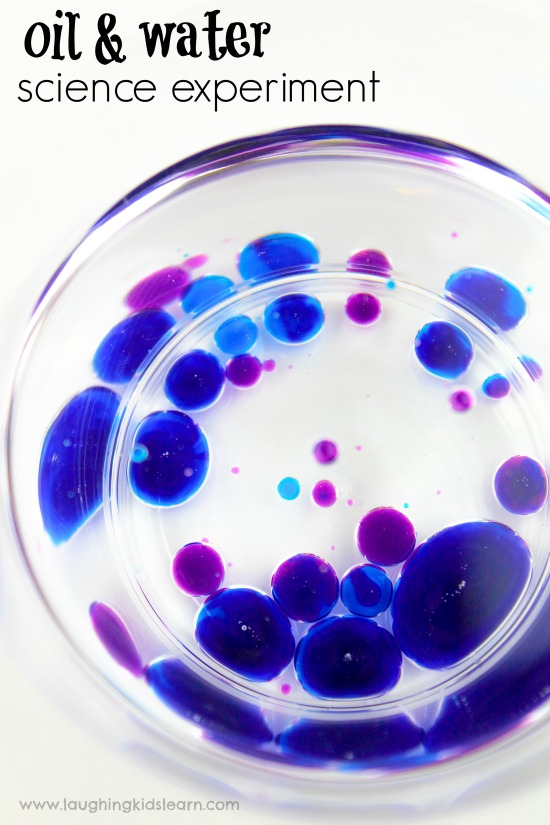
Possum (aged 8 years) and Boo (aged 5 years) absolutely love to engage with science experiments and this was certainly a fun one for us to try at home.
This simple science activity teaches children about liquid density and highlights how some liquids are heavier or lighter than others. It’s visually appealing and makes for some great opportunities for younger ones to verbalise what they see is happening.
Recommended age – 5 years + (Strict and active supervision is required at all times)
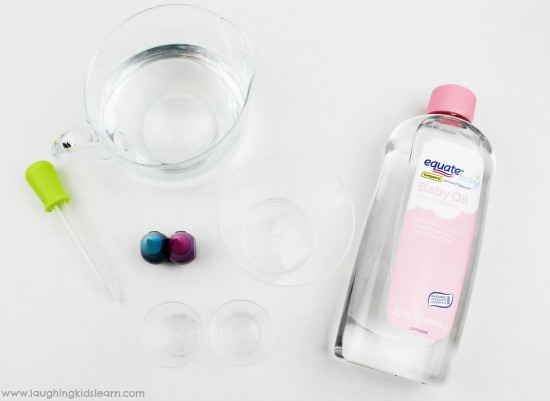
For this science activity, you’ll need to collect the following items –
- Bowl or jar
- Food coloring
Items required for this experiment are found around the home or at your local craft store.
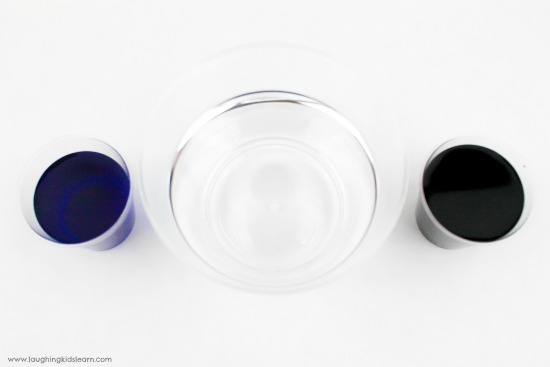
Begin by filling some small cups with water.
Add 2-3 drops of food coloring to each cup and stir with spoon.
Fill the larger cup or bowl with baby oil.
Keep in mind, you don’t need to fill your bowl too much with oil. About 1/4 or 1/2 way is fine.
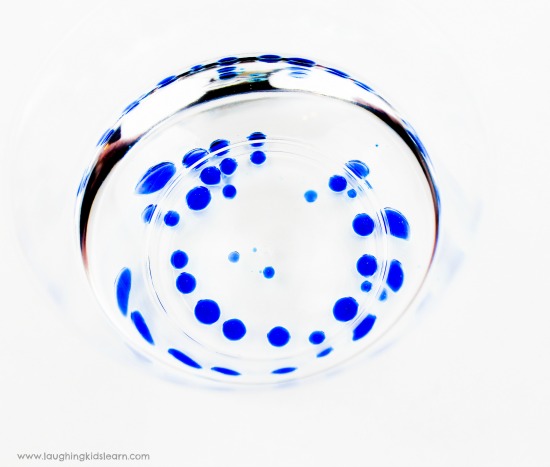
Fill a dropper with the colored water and have your child sprinkle the water over the oil and observe.
Can your child describe what is happening?
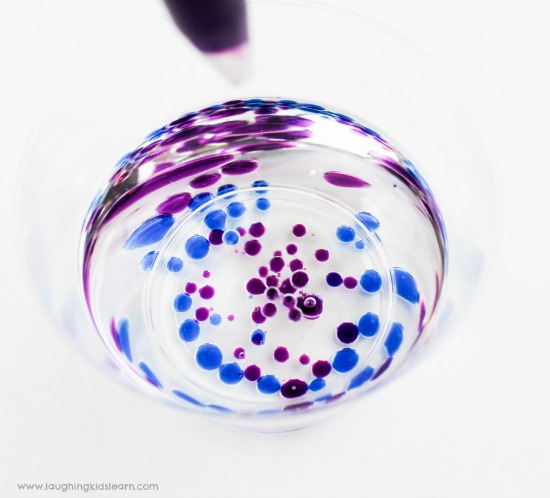
Your child should be able to observe that the droplets of water do not mix with the water.
Why does the oil and water not mix together?
There are two parts to this answer.
Firstly, the molecules in oil are attracted to other molecules in oil.
Same with water, water is attracted to water!
Secondly, oil and water have difference densities . That means they weight different amounts. Oil is much heavier than water so the oil is likely to sit towards the surface of the water. This mixing oil and water science experiment for kids is fascinating!
Additional information about the science of this activity can be found at this great article .
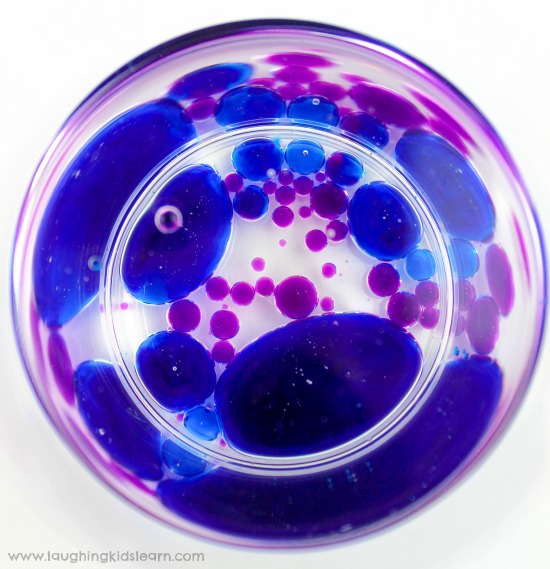
Your child should notice, adding more and more droplets makes no difference. The water and oil will still not combine. The oil and water would continue to separate, regardless if it were to be shaken in a tightly sealed jar.
Oil and water are not friends!
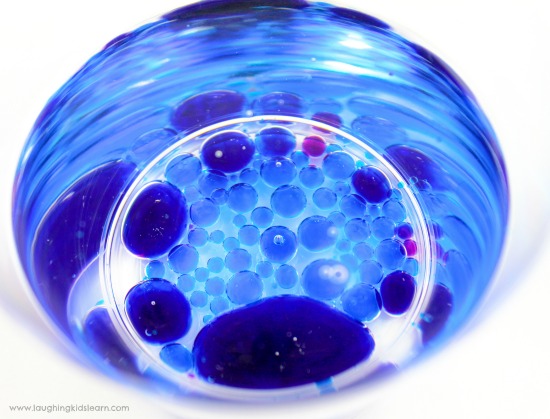
Over time teeny tiny droplets of water will look to discolour the oil, but will soon separate again.
Mixing oil and water science experiment (extention)
You might like to extend this activity and challenge your children by adding a few drops of liquid dishwashing detergent.
Does the liquid detergent change your original observations?
February 10, 2021 at 8:26 am
This is amazing mahn, it would be so much fun experimenting with this stuff especially when you are bored at home. I love most of your blogs, the way you put everything in simple words with images just shows how much you really care about your readers. Thanks 😉
March 21, 2021 at 7:22 am
Love this post! Might be worth correcting that water is heavier (more dense) than oil though, and that’s why it sits under the oil – not the other way around as written
Please Leave a Comment: Cancel reply
Your email address will not be published. Required fields are marked *
Find Activities by Age
- 0 – 12 months
- 1 – 3 years
- 3 – 5 years
- 5 – 10 years
Find Activities by Celebration
- SHOP PRODUCTS
Privacy Policy
- Disclosure and Privacy Policy
Find posts by month
Find quality-rated child care
All State Agencies | Help Center | State Directory


Star-Rated Quality
How to choose child care, ages & stages, keeping my child healthy, family resource library, family buzz newsletter, providers & teachers.
Provider Tools
Provider calls, curriculum & supplements, provider buzz newsletter, star kit all levels, provider rules and regulations, ar resource connections.
Trending Topics

Edades y Etapas
Biblioteca de recursos.

Parents & Families
Home » Parents & Families » Family Resource Library » Science » Oil and Water Experiments
Oil and Water Experiments
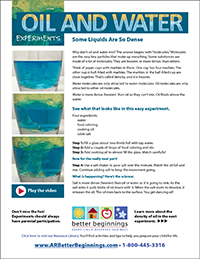
Some liquids are so dense.
Why don’t oil and water mix? The answer begins with “molecules.” Molecules are the very tiny particles that make up everything. Some substances are made of a lot of molecules. They are heavier, or more dense, than others. Think of paper cups with marbles in them. One cup has four marbles. The other cup is half-filled with marbles. The marbles in the half-filled cup are close together. That’s called density, and it is heavier.
Water molecules are only attracted to water molecules. Oil molecules are only attracted to other oil molecules.
Water is more dense (heavier) than oil so they can’t mix. Oil floats above the water.
See what that looks like in this easy experiment.
Four ingredients:
food coloring
cooking oil
table salt
Step 1: Fill a glass about two-thirds full with tap water.
Step 2: Add a couple of drops of food coloring and stir.
Step 3: Add cooking oil to almost fill the glass. Watch carefully!
Now for the really neat part!
Step 4: Use a salt shaker to pour salt over the mixture. Watch the oil fall and rise. Continue adding salt to keep the movement going.
What is happening? Here’s the science:
Salt is more dense (heavier) than oil or water so it is going to sink. As the salt sinks it pulls blobs of oil down with it. When the salt starts to dissolve, it releases the oil. The oil rises back to the surface. You get dancing oil!
Learn more about the density of oil in the next experiment.
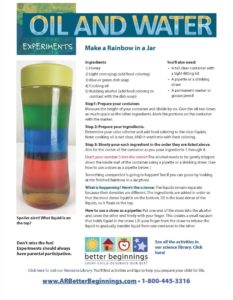
Make a Rainbow in a Jar
Ingredients
2) Light corn syrup (add food coloring)
3) Blue or green dish soap
4) Cooking oil
5) Rubbing alcohol (add food coloring to contrast with the dish soap)
You’ll also need:
A tall clear container with a tight-fitting lid
A pipette or a drinking straw
A permanent marker or grease pencil
Step1: Prepare your container. Measure the height of your container and divide by six. Give the oil two times as much space as the other ingredients. Mark the portions on the container with the marker.
Step 2: Prepare your ingredients. Determine your color scheme and add food coloring to the clear liquids. Note: cooking oil is not clear, AND it won’t mix with food coloring.
Step 3: Slowly pour each ingredient in the order they are listed above. Aim for the center of the container as you pour ingredients 1 through 4.
Don’t pour number 5 into the center! The alcohol needs to be gently dripped down the inside wall of the container using a pipette or a drinking straw. (See how to use a straw as a pipette below.)
Something unexpected is going to happen! See if you can guess by looking at the finished Rainbow in a Jar photo.
What is happening? Here’s the science: The liquids remain separate because their densities are different. The ingredients are added in order so that the most dense liquid is on the bottom. Oil is the least dense of the liquids, so it floats to the top.
How to use a straw as a pipette: Put one end of the straw into the alcohol and cover the other end firmly with your finger. This creates a small vacuum that holds liquid in the straw. Lift your finger from the straw to release the liquid to gradually transfer liquid from one container to the other.
See all the activities in our science library. Click here !
Don’t miss the fun! Experiments should always have parental participation.
Click here to visit our Resource Library. You’ll find activities and tips to help you prepare your child for life.
Interactive Parent Tool >
Sign up for buzz newsletter >, website navigation tips >, parents & families >, providers & teachers >.

Teach Kids to Prevent Germs with this Science Experiment
I love getting books for my son that explain basic germ prevention , hygiene and life skills. One day we were looking in the Children’s Science section of the library and saw the book, You Wouldn’t Want to Live Without Soap! by Alex Woolf and Mark Bergin.
This book gives children the history of soap, how it is made and why it works. We learned that before soap was invented, people used urine, incense smoke, clay, sand pumice, and ashes to clean themselves.
The pictures in this book are colorful and appealing to children. It will make your children laugh, say “ewwww”, and become more curious. The authors have included hands-on activities and tips that will further your child’s understanding of soap and its purpose.
One experiment we did involved ingredients you have in your home such as oil, water, and dishwashing liquid. It teaches kids why soap is a better cleaner than water by itself. My son learned that water and oil don’t mix, so washing with water only leaves most of the dirt behind.
I will show you the experiment and other discoveries we made.
Let’s Get Started!

Materials Needed:
- Cooking Oil
- Dishwashing liquid
Directions:
- Put cooking oil and water in a jar.
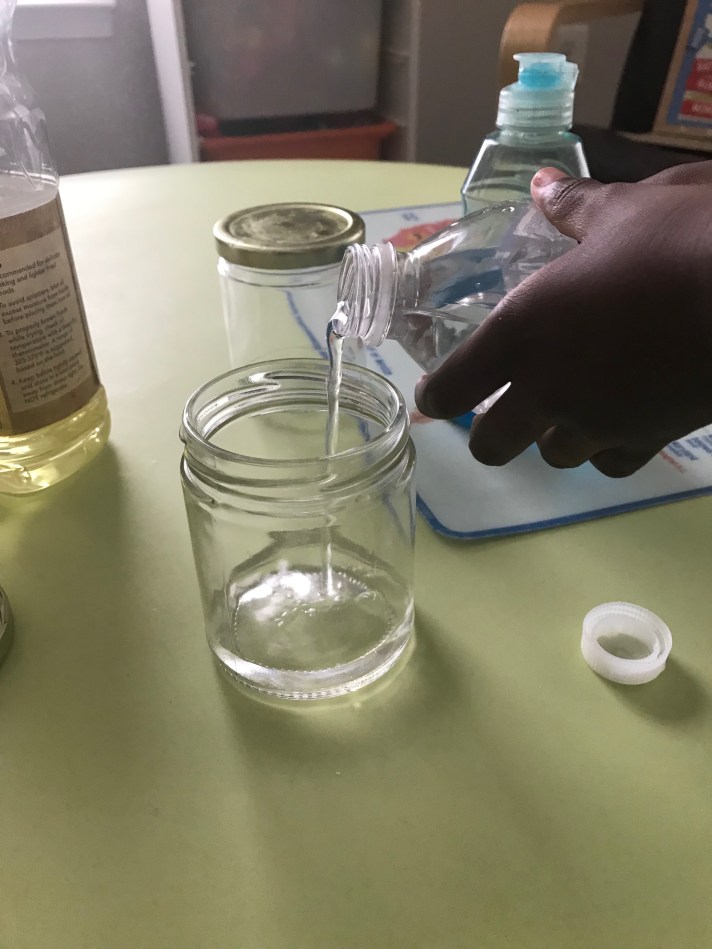
- Screw on the lid and shake
- The oil and water should separate into layers

- Add drops of dishwashing liquid to the jar and shake again

- This time it should make a cloudy mixture
- Oil and water are no longer separate layers

- One jar should have oil and water.
- The second jar should have a mixture of oil, water, and dishwashing liquid.

Why this Experiment Works and How Germs are Washed Away
- Most dirt contains oil.
- Oil and water do not mix so washing with water only leaves most dirt behind.
- Soap binds to water, dirt, and oil.
- The tail of soap molecules attach to oil.
- The head of soap sticks to water.
- When soapy water mixes with dirt, the soap molecules form tiny clusters called micelles.
- When you wash your hands with soap, dirt mixed with oil from your skin is pulled inside the micelles, then rinsed away.
- In the experiment, the soap molecules grabbed the oil and water making a cloudy mixture in the jar.
I hope this helps! Have fun with this experiment!
OUR KID FRIENDLY FAST & FUN STUDY TRICKS FOR BETTER GRADES: 9 FUN STRATEGIES FOR SUCCESS IN LEARNING AND SCHOOL HAS $29 OFF THE ORIGINAL PRICE.
Our books are available on Amazon, “Teach Your Toddler to Read Through Play,” “Fun Easy Ways to Teach Your Toddler to Write , and “Teach Your Child About Money Through Play. “
THE TEACH YOUR TODDLER TO READ THROUGH PLAY ONLINE COURSE HAS A $97 DISCOUNT.
Click here for the PAYMENT PLAN OPTION!
Share this:
Published by simplyoutrageousyouth
View all posts by simplyoutrageousyouth
22 thoughts on “ Teach Kids to Prevent Germs with this Science Experiment ”
That is great and also a fun activity to get the kids to help us make!!
Thank you for your comment and compliment!
Yes! With flu season upon us it’s so important to teach kids about germs and how to prevent getting sick. I love this activity.
Thank you! I am glad you found this helpful!!
Great post, teaching the kids about germs is very important.
Yes it is! Thank you for the compliment and comment!
I love this experiment. We have been practicing hand hygiene with the kids preparing for an upcoming cruise. Maybe this experiment will help them understand why we need soap!!
Oh good! I hope your kids enjoy this experiment!
Love this simple lesson on germs will have to share it with my kids.
Thank you! My son loved this activity and understands the importance of using soap.
I love this kid friendly science experiment what a fun way to teach our little ones the importance of washing their hands!
Thank you! I love simple experiments that are fun and educational.
My son loves science, so this is a great way to show him how washing hands gets rid of germs. You are so creative!
Thank you Jessica! I hope your son likes this activity!
What a cute way to teach kids about germs and how to kill them! My little ones are always interested in the why and the how—this would be a nice way to give them that but more hands on!
My son is curious like your children. I think your kids will like this experiment! Thank you for your comment.
This is a great way to teach kids about germs and the importance of washing with soap to stay healthy and clean. I love this simple science experiment that can be done even with young children. What a great visual way to teach an important concept!
Thank you for your comment! I am glad you liked the experiment!
What a good idea! This is a great way to show young kids how important it is to wash your hands!
Thank you for your comment!
- Pingback: 4 Fun & Simple Activities/Games That will Teach Kids about Germs -
- Pingback: How To Make A Catapult Easy - Fun Activity for Kids -
Leave a Reply Cancel reply
Discover more from.
Subscribe now to keep reading and get access to the full archive.
Continue reading

Getaway Tips & Hacks
The great wolf pack, entertainment, activities & crafts, food & beverage, holiday & celebrations, seasonal activities, book your stay.

Sign Up for Exclusive Deals!
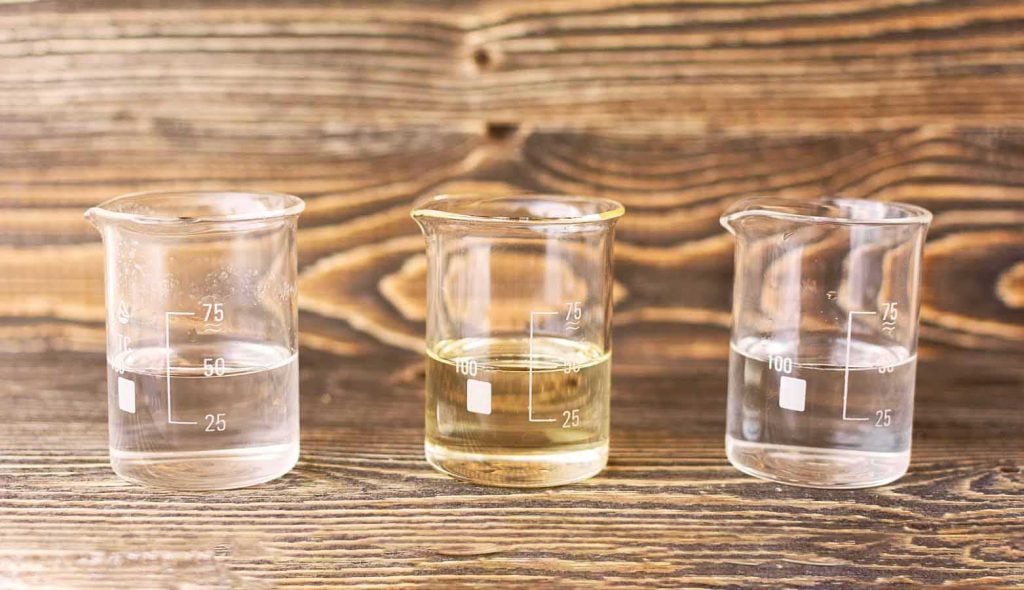
Kitchen Science: 3 Mini-Experiments to Try at Home
Did you know that research shows that children’s curiosity makes them natural explorers of STEM topics? It’s true! While you’re going throughout your day, playing blocks with your child, changing their pants after a roll in the dirt, or thinking that they couldn’t possibly ask another question, you might not realize that you have a budding scientist on your hands.
Your best parental move? Encourage exploration and experimentation early and often while incorporating some fun science experiments for kids.
“When you introduce scientific thinking to your child as a parent, you build a foundation for learning, the ability to think critically, and raise your child’s confidence levels,” says Erica Peterson, founder of Science Tots , an organization committed to early STEM education.
You don’t have to set up a lab in the middle of your living room, though—because we have three easy (and fun) oil and water experiments, along with three mini-science lessons, that you can do in 30 minutes or less to inspire curiosity in your kids.

Kitchen Materials Needed for the Experiments:
- Glass jar with a lid
- Vegetable oil
- Food coloring
- Pipette, dropper, or syringe
- Small container or bowl
Mini-Experiment #1: Teaching Basic Chemistry Through The Rules of Attraction
Many students find chemistry to be their most difficult subject, but if you instill basic concepts (like the rule of attraction) at a young age, your child can find it energizing instead of challenging. Plus, we love this easy kitchen science experiment because you likely have all the ingredients in your cabinet.
What to Do:
- Fill the glass jar about halfway with water. Fill it the rest of the way with vegetable oil.
- Ask your child(ren) what they see. Did the oil and water mix?
- Now, shake up the water and oil mixture. Did it mix now?
The Basic Chemistry Experiment, Explained:
The water and oil don’t mix because they are immiscible , meaning the water molecules are attracted to the water and the oil molecules are attracted to the oil. Even when you shake it up, as soon as the molecules settle they separate. And, the water is always on the bottom because it has a higher density than the oil. By seeing this firsthand, your children are getting a glimpse of what it means when the chemical compositions of liquids are different from one another. The sizes of oil and water molecules are different, and so are their forces of attraction.
Mini-Experiment #2: Good, Clean Fun to Understand Emulsion
Now, let’s take the rules of attraction further by introducing emulsion. The simple definition? Emulsion is what happens when two liquids that don’t normally mix, mix. It’s a good way to explain what they just learned (and we’re pretty sure any child will jump at the chance to use food coloring).
- In a small bowl, combine a tablespoon or two of dish soap with a drop or two of food coloring. Mix to combine.
- Using the dropper, put a few drops of the colored solution into the jar you just used, with the water and oil. You should see an effect similar to a lava lamp. Challenge your children to try to explain what happened (after all, you just taught them that oil and water don’t mix).
The Emulsion Experiment, Explained:
So, what caused this? The dish soap is attracted to both water molecules and oil molecules, which is why it forces them to mix. The soap acts to dissolve the oil, allowing the oil and water to mix together. The oil molecules are suspended in the dish soap, which is suspended in the water. This demonstrates emulsion, and it’s why dish soap cleans so well!
Mini-Experiment #3: Get Salty to Explore Density
Our last mini-lesson is in density (AKA mass per unit of volume or the amount of stuff in a given amount of space). If an object is heavy and compact, it has high density. If an object is light and takes up space, it has low density.
We also love this lesson because it’s a fun way for your children to visualize what can feel like an abstract concept.
- Pour a tablespoon or so of salt into the jar. Let your child experiment with starting with a pinch and gradually adding more. It’s a great sensory experiment for children to watch the movement in the jar.
- Again, you should get a lava lamp effect.
The Density Experiment, Explained:
In the beginning of the experiment, the oil settles above the water because it is less dense . Because the salt is heavier than the water, it floats straight to the bottom, bringing some of the oil with it since the oil is on top. But, as the salt starts to dissolve in the water, it releases the oil which floats back up to the top.
Ask your children what’s more dense: oil, water, or salt? Then, encourage them to experiment with different jars, food colorings, food (will sugar do the same thing?), or anything else they want to test. It’s sometimes about the scientific journey more than the result—and by encouraging them to experiment and research, you’re encouraging their scientific development.
Ask your kids to write down what they learned (some definitions to keep handy: molecules, immiscible, emulsion) during these oil and water experiments for kids. Keep the conversation, curiosity, and kitchen science going with a science journal to document your findings. You might just find that you have the next Marie Curie on your hands!
Leave a Comment Cancel Reply
Your email address will not be published. Required fields are marked *

- At the Lodge
- Food and Recipes
- Things to Do
- Travel Tips
- Main Website
- Accessibility
Subscribe & Save!
- Privacy Policy & Terms and Conditions
- © 2024 Great Wolf Resorts, Inc. All rights reserved.
- 350 N Orleans St, Chicago, IL 60654
Please refer to our Privacy Policy or contact us for more details.
Pin It on Pinterest

IMAGES
COMMENTS
Oct 24, 2024 · Secondly, the oil always floats on top of the water because the oil has a lower density than water. You can find out why liquids layer by density in our Density Experiment. Detergent is different again. It is attracted to both water and oil molecules. Detergent grabs onto both types of molecules causing oil droplets to be suspended in the water.
Observe what happens to the Oil and the Water. Next, take the lid off the jar and squirt in 1-2 teaspoons of dish soap. Tighten the lid back on the jar and shake again for another 15-20 seconds. Set the jar down and watch the liquid for a minute or two. Observe what happens to the Oil and the Water now that the dish soap has been added to the mix.
Oct 9, 2023 · If you really think oil and water belong together then try adding some dish washing liquid or detergent. Detergent is attracted to both water and oil helping them all join together and form something called an emulsion. This is extra handy when washing those greasy dishes, the detergent takes the oil and grime off the plates and into the water ...
Feb 3, 2018 · You will need:Glass jam jar or any bottle (with lids if you want to shake them)Jug of waterVegetable oilWashing up liquidFood colouringSmall containerA stirr...
In this fun and easy density science experiment for kids, we're going to see if oil and water mix. Materials: Water Empty plastic bottle Food coloring Cooking oil Dish washing liquid Instructions: Add ½ cup of water to the empty plastic bottle. Add a drop or two of food coloring to the water. Add ½ cup of cooking oil to the plastic bottle. Screw the lid onto the bottle and shake vigorously ...
Jul 13, 2020 · Oil and water are not friends! Over time teeny tiny droplets of water will look to discolour the oil, but will soon separate again. Mixing oil and water science experiment (extention) You might like to extend this activity and challenge your children by adding a few drops of liquid dishwashing detergent. Does the liquid detergent change your ...
Learn more about the density of oil in the next experiment. Make a Rainbow in a Jar. Ingredients. 1) Honey. 2) Light corn syrup (add food coloring) 3) Blue or green dish soap. 4) Cooking oil. 5) Rubbing alcohol (add food coloring to contrast with the dish soap) You’ll also need: A tall clear container with a tight-fitting lid. A pipette or a ...
Oct 31, 2019 · The second jar should have a mixture of oil, water, and dishwashing liquid. The left jar has water, oil, and dishwashing liquid. The right jar has oil and water. Why this Experiment Works and How Germs are Washed Away. Most dirt contains oil. Oil and water do not mix so washing with water only leaves most dirt behind. Soap binds to water, dirt ...
Aug 4, 2024 · The fun part about this oil and water science experiment is kids will also be able to explore colors! It’s a lot of fun and educational. You can do this oil and water experiment at home or in the classroom. Let’s try out this fun oil and water science experiment. Oil And Water Science Experiment. Science is awesome! Simple science ...
So, what caused this? The dish soap is attracted to both water molecules and oil molecules, which is why it forces them to mix. The soap acts to dissolve the oil, allowing the oil and water to mix together. The oil molecules are suspended in the dish soap, which is suspended in the water. This demonstrates emulsion, and it’s why dish soap ...